3248 / Drop Pocket Cardigan // Step-by-Step Tutorial
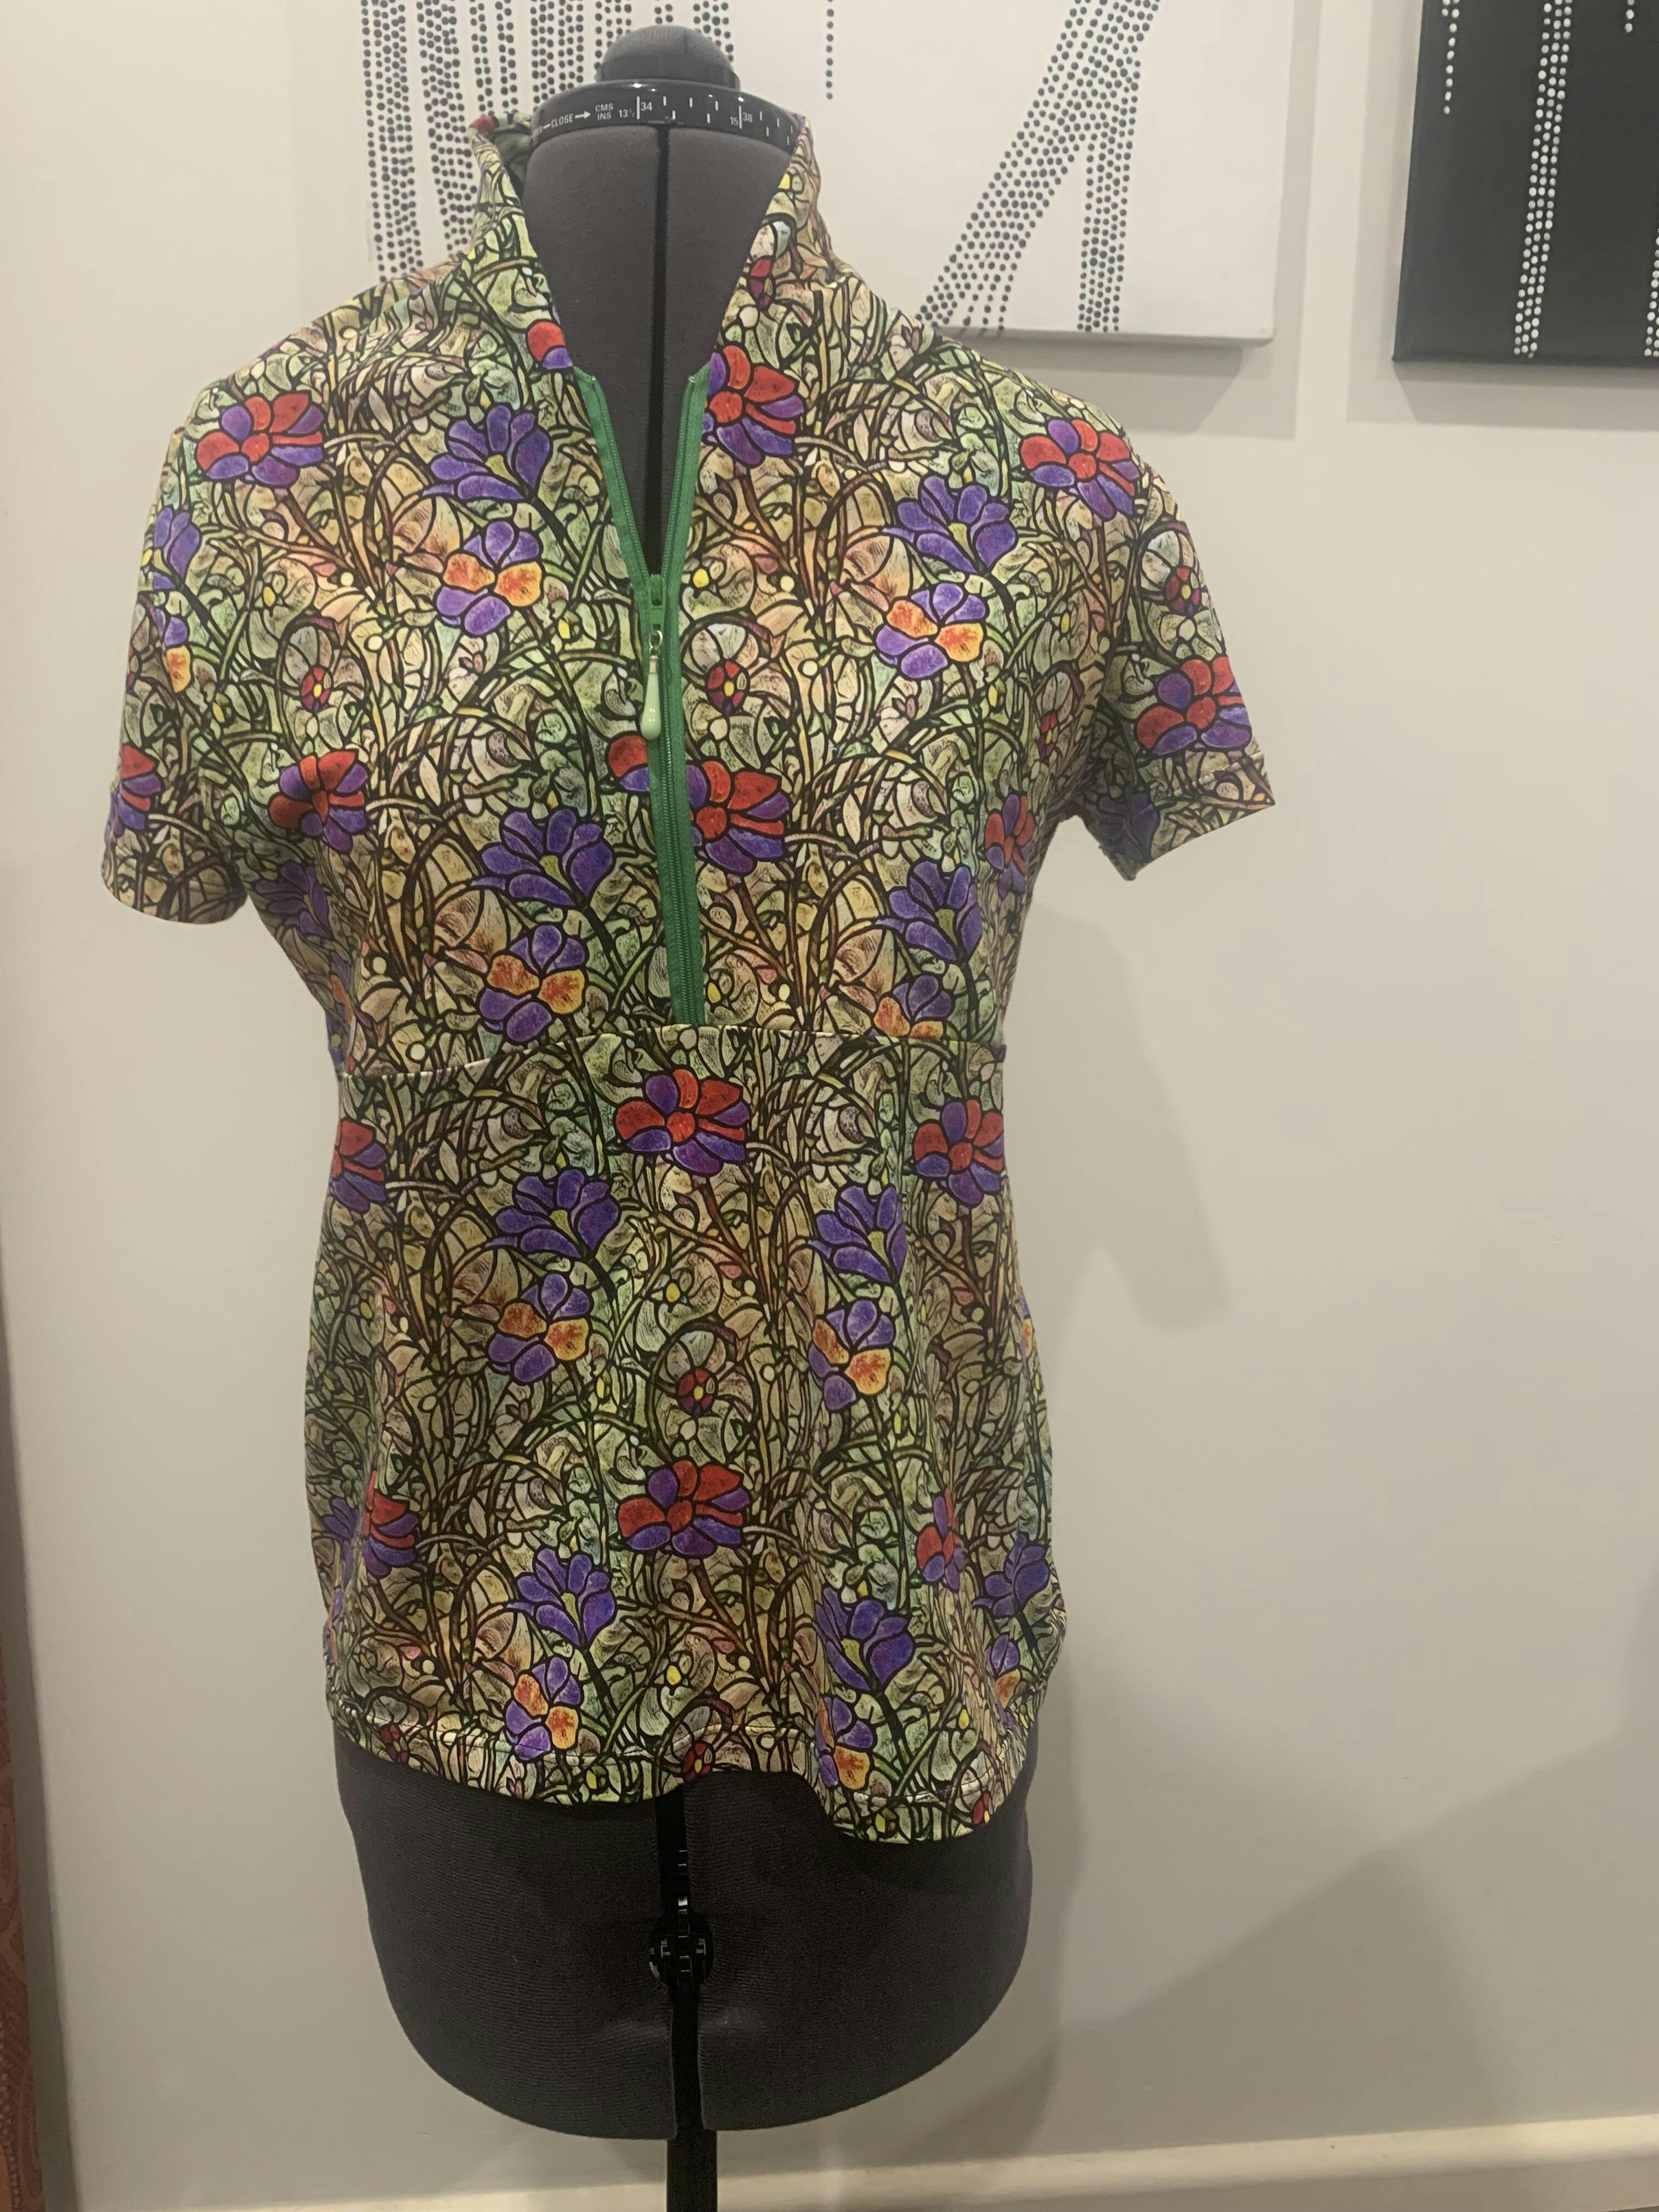
Since its launch, our drop pocket cardigan (3248) is a favorite because of its generous pockets and clever construction that hides most of the seam allowances. A knit cardigan with a professional finish that you can sew with a regular sewing machine!

This sewing pattern is only available in PDF format, which we managed to fit on 20 pages! If you are not a fan of taping pages together, you can use the copy shop or projector files that are also included in the pattern.
You get 28 sizes in one pattern (kids and adult sizes) but can print one size at a time so you do not have to trace.

For this tutorial, we will be using a printed polyester knit (ITY). This type of fabric is easy to find and usually very affordable. Perfect for your first drop-pocket cardi!
Fold binding wrong sides together, its raw edge along the seam. Fold the wrapped seam allowance to the right side of the back and pin:
Topstitch along the folded edge of the binding:


Pin sleeve to armhole, matching its center (notch) with the shoulder seam.


Pin back hem and topstich with a zigzag, coverstitch or double needle:

Fold sleeve hems to wrong side by 2.5 cm (1'') and topstitch:

You now have a comfortable transitional piece in your wardrobe! Layer it over a cami / tank top or sleeveless dress when it's cool outside or when the A/C is on at the office.


This sewing pattern is only available in PDF format, which we managed to fit on 20 pages! If you are not a fan of taping pages together, you can use the copy shop or projector files that are also included in the pattern.
You get 28 sizes in one pattern (kids and adult sizes) but can print one size at a time so you do not have to trace.
FABRIC CHOICE
For the first run, picking fabrics that have different right/wrong sides will help you better understand the instructions. Using a contrast front lining fabric will also help.For this tutorial, we will be using a printed polyester knit (ITY). This type of fabric is easy to find and usually very affordable. Perfect for your first drop-pocket cardi!
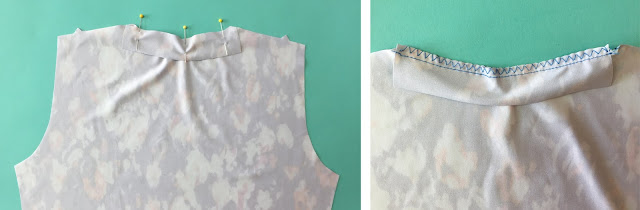
NECK BINDING
The first step is to finish the back neckline. Pin RIGHT SIDE of back neck binding to WRONG SIDE of back neckline, matching ends and centers. Baste with a zigzag and stitch 6 mm (1/4'') from edge, using a straight stitch:
Fold binding wrong sides together, its raw edge along the seam. Fold the wrapped seam allowance to the right side of the back and pin:

Topstitch along the folded edge of the binding:

FRONT ASSEMBLY
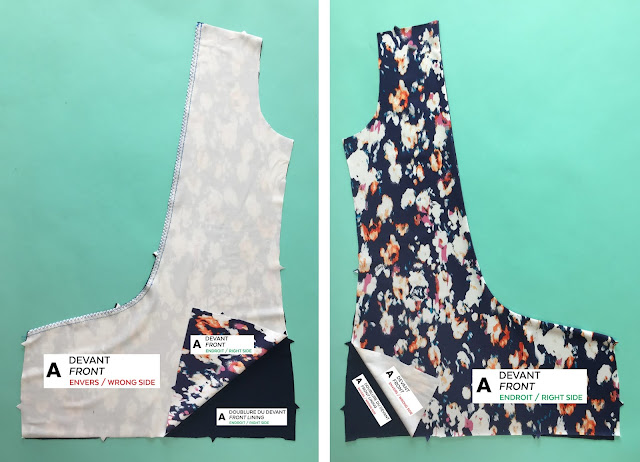
As you will see in the instructions available on the Jalie website, we refer to the front pieces as FRONT and FRONT LINING. The FRONT fabric is what is visible from the pocket up. The LINING is what you see at lower front and inside when you open the cardigan.
Pin each front piece to its lining, right sides together, and stitch, 6 mm (1/4'') from edge, without stretching the fabric as you sew:

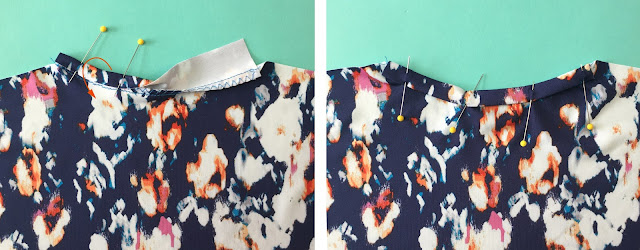
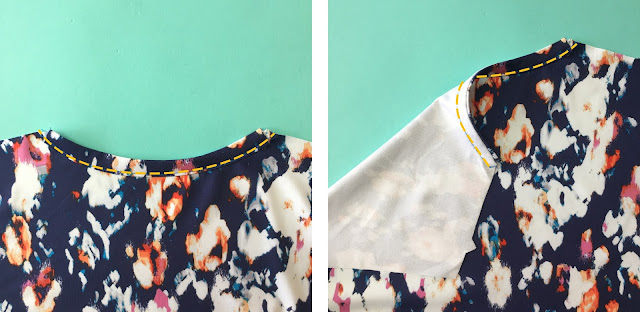
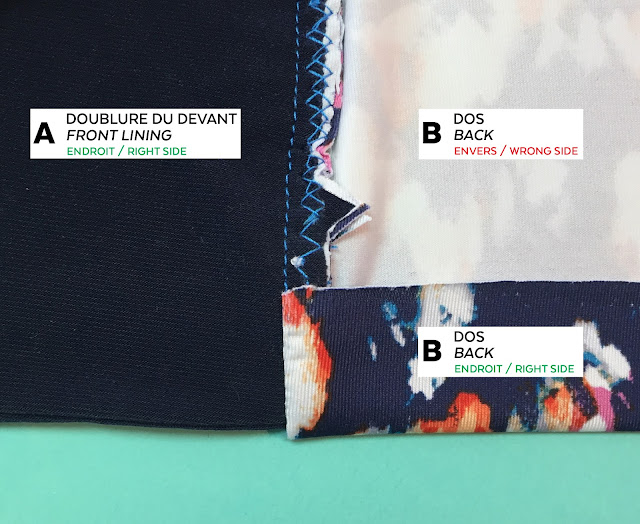
Now, it's time to sew the shoulder seam. We start with the right shoulder.
VERY IMPORTANT: Open the front pieces before pinning the back shoulder to the FRONT shoulder. The finished edge of the back neckline it aligned with the seam. Baste with a zigzag, catching the back and front only (not the lining):
VERY IMPORTANT: Open the front pieces before pinning the back shoulder to the FRONT shoulder. The finished edge of the back neckline it aligned with the seam. Baste with a zigzag, catching the back and front only (not the lining):
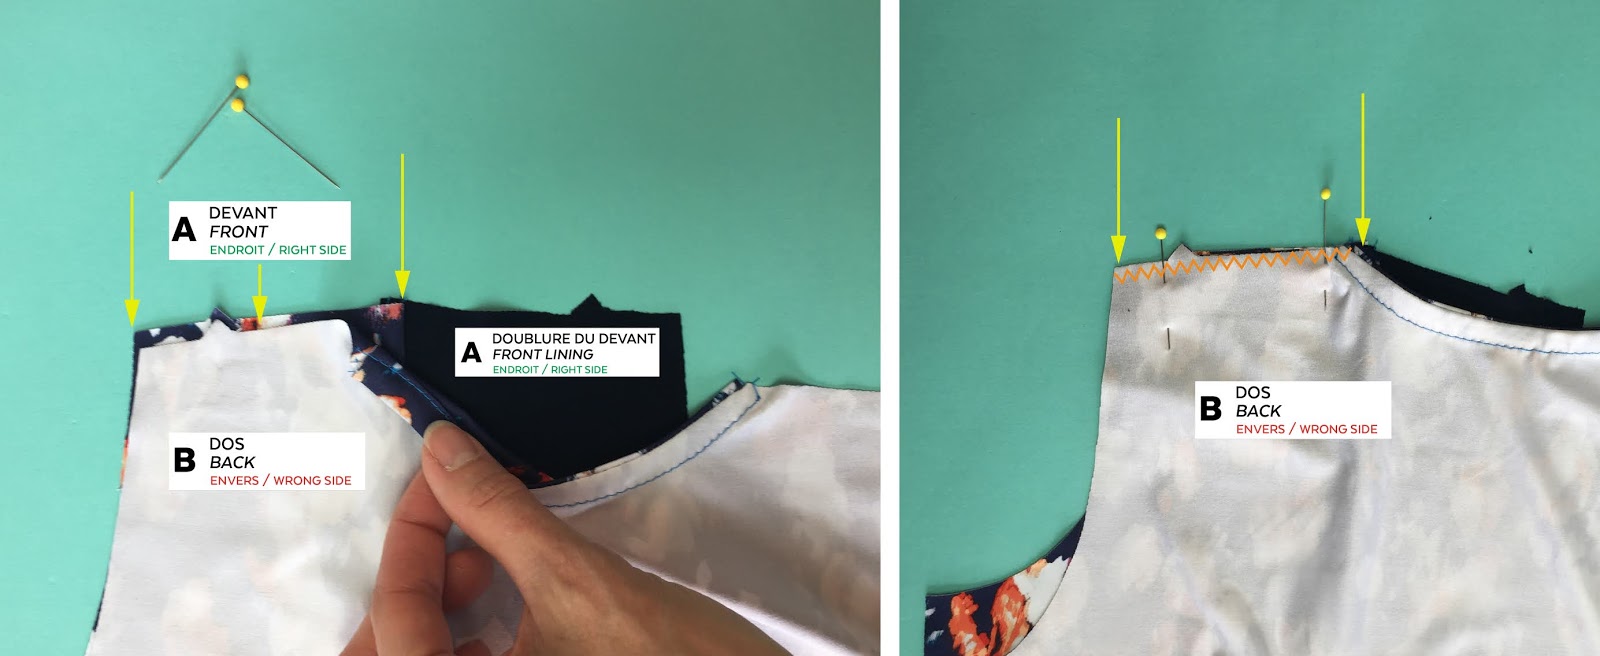
Bring the front LINING over the basted seam, pin and stitch 6 mm (1/4'') from edge, without stretching the fabric:

Turn the shoulder seam right side out. Look how clean the finish is! Repeat these steps to sew the left shoulder seam.

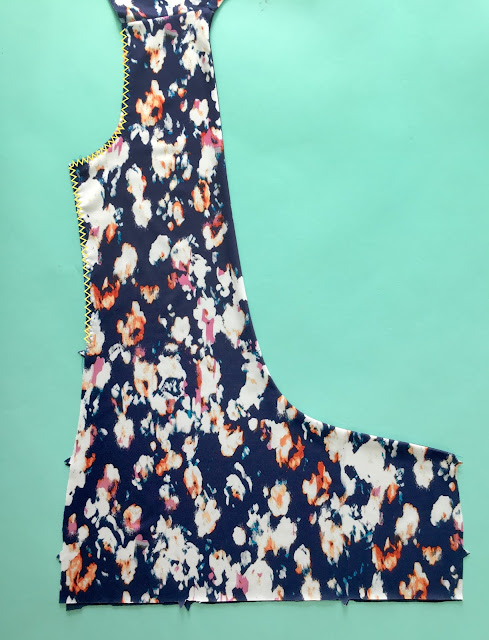
Bring front and lining wrong sides together and baste armhole and sides with a zigzag, down to the first notch.

Pin sleeve to armhole, matching its center (notch) with the shoulder seam.

POCKET AND FRONT HEM
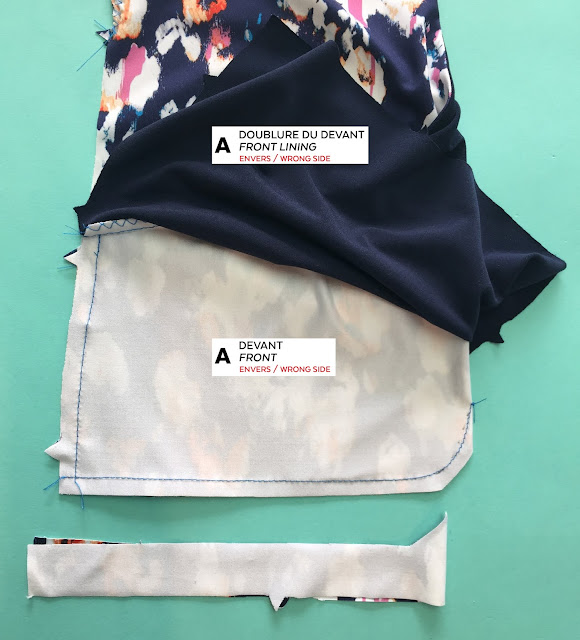
Fold front (all layers) to bring the notches together at the side. Then, lift the LINING fabric and pin the front layers together. Mark a seam line 3 cm (1 1/8'') from bottom edge that ends in a curve at the fold:
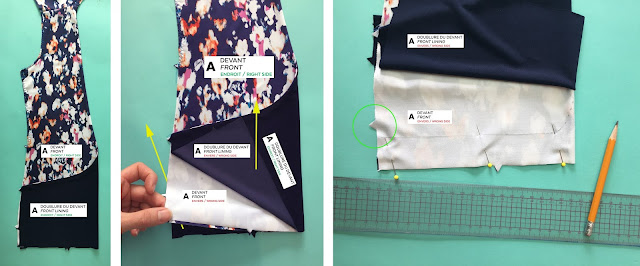
Stitch on the line and baste the side to keep the front layers together. Then, trim the bottom seam allowance 6 mm (1/4'') from the seam:

Stitch on the line and baste the side to keep the front layers together. Then, trim the bottom seam allowance 6 mm (1/4'') from the seam:

Bring lining back in place to better see the bottom edge notches you have to bring RIGHT SIDES together. Pin and stitch. This will close the bottom of the fronts (no need to hem later on).

This step is not easy to photograph so we made a video showing how to manipulate the fabric.
Bring the pocket back into position, matching side seam notches of the four layers of fabric together. Baste with a zigzag along the raw edge of the fabric:

This step is not easy to photograph so we made a video showing how to manipulate the fabric.
Bring the pocket back into position, matching side seam notches of the four layers of fabric together. Baste with a zigzag along the raw edge of the fabric:

Pin front to back at side and underarm seams, matching notches and seams, and stitch. The back will be longer than the front. That is ok. We will need this excess fabric for the next step:

BACK HEM AND FINISHING
If you have a serger, it is now time to finish the raw edges of the back and sleeve hem before continuing to the next steps (optional).
Bring right side of bottom BACK edge and bring it over the lining. Pin at side seam and stitch 6 mm (1/4'') from edge:
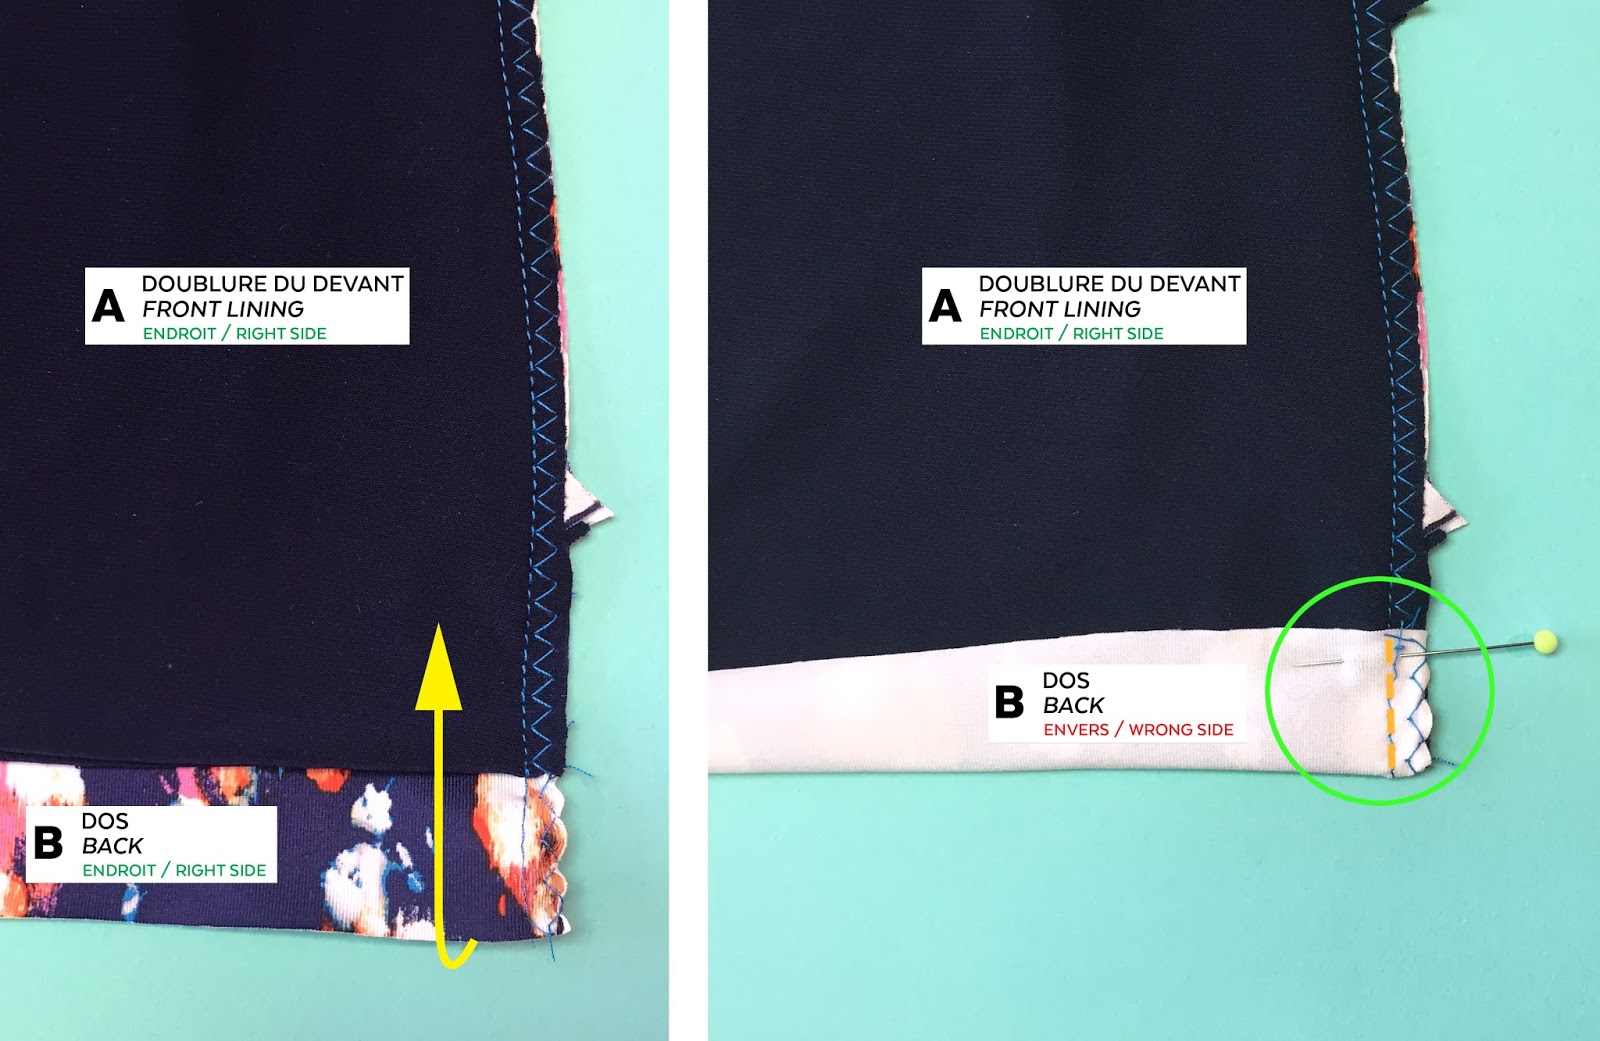
Turn corner right side out:

Pin back hem and topstich with a zigzag, coverstitch or double needle:

Fold sleeve hems to wrong side by 2.5 cm (1'') and topstitch:

You now have a comfortable transitional piece in your wardrobe! Layer it over a cami / tank top or sleeveless dress when it's cool outside or when the A/C is on at the office.

This cardigan may look complicated, but if you follow these steps, you will be surprised at how easy and quick it is to sew. It's one of those instant gratification pieces that you can make in different fabrics when you need to kick-start your sewing mojo :)
Happy sewing!
← NIKITA // Workout Top Sewing Tutorial Clara without gusset →