Skip to content


FREDERIC HOODIE // TIPS AND TRICKS PART 1/2
The Frédéric Hoodie is a great pattern that looks great in kids and adult sizes. Some people do inquire about the level of difficulty because of the seaming, zippered pockets and lined hood.

With this tutorial, we want to give you the confidence you need to tackle this project. If you take your time and use the tips and tricks in this tutorial, everything should go well and you will be sooo proud of the finished garment!

The pattern includes 27 sizes for boys and men. Women can make it too of course! If you like hoodies that go straight down from the bust, you will love this style.

In this first post, we will highlight some techniques that require more dexterity and preparation. They are not complicated but you do have to take your time.
We wanted this to be accessible to as many people as possible so we will used a regular sewing machine for all the steps. Everything is done with straight stitch and zigzag.
In this post, we will see how to:
- KEEP TRACK OF YOUR MAKES AND STAY ORGANIZED
- MAKE ZIPPERED KANGAROO POCKETS
- KEEP SEAMS LINED UP
Please note that complete sewing instructions are available on the website, on the FREDERIC HOODIE page (under "instructions and tutorials"). You can access them at any time, before and after you purchase the pattern. We will refer to the steps throughout the tutorial

For EACH project, we log the vital information. This way, when you pull out your Jalie pattern to make a new piece because your child outgrew the first one, you will know exactly what you did and have info about the fabrics you used and alterations you made a while ago.
This log book is not only a great way to keep track of everything but is will also be a reminder of every you made. You will be filled with pride when you reach the last page and need a new notebook!

For the FREDERIC, you can play with different fabric weights and textures. Our favorite is fleece or stretch fleece as main fabric, jersey for the hood lining and binding, rib knit for the cuffs. Have fun with color blocking!
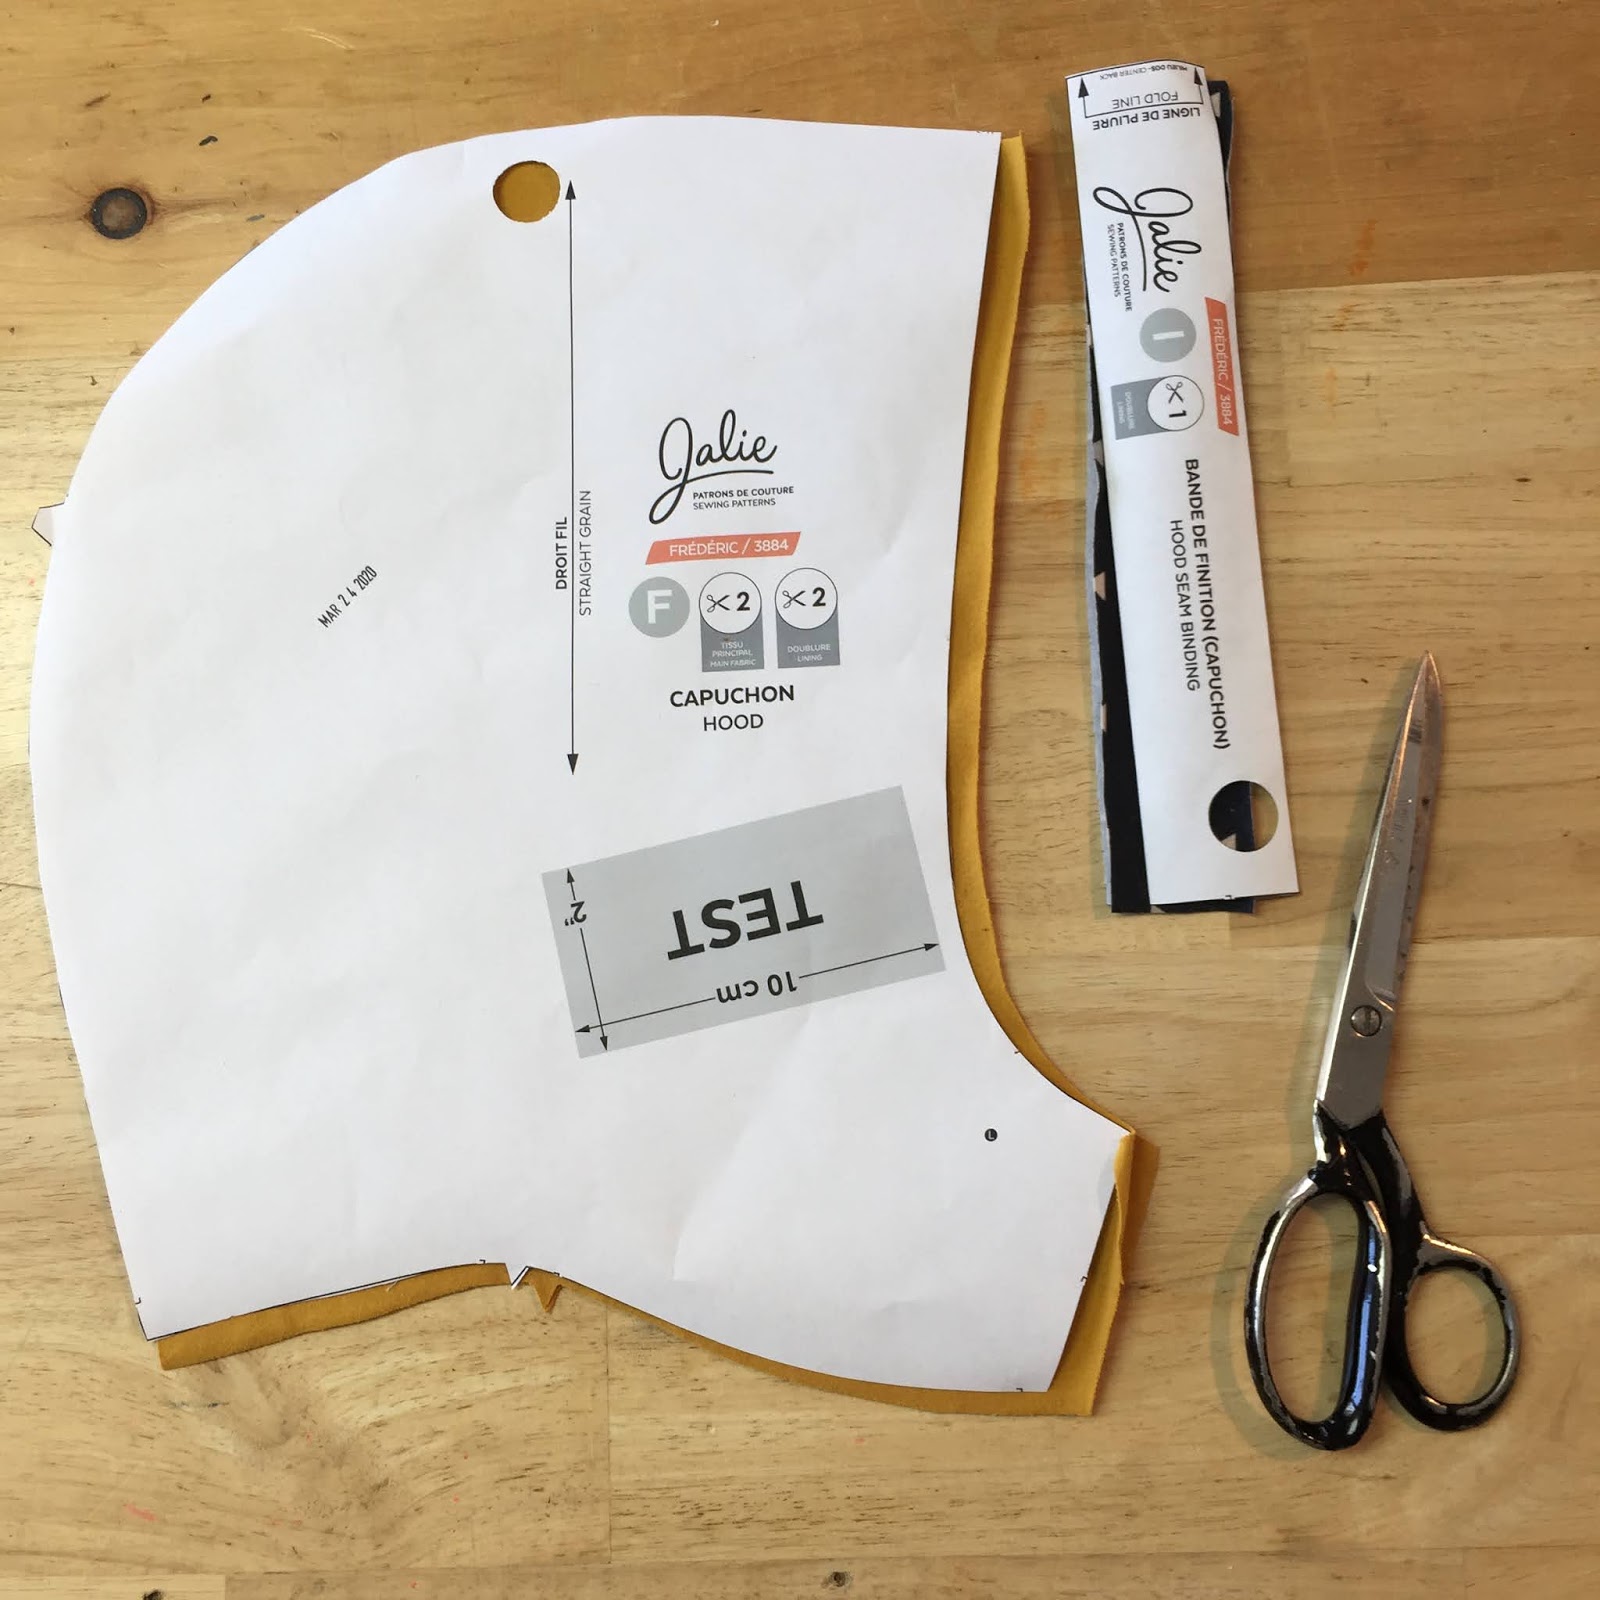
We write the date on the pattern pieces and punch a hole to hang the pattern on a rod at the studio, using a pattern hook:


First, mark and press the pleat on the right side of the pocket (step 3 of the instructions). The pleat will be your guide when sewing your zipper:

Pin your zipper, face down, along the edge of the fabric and stitch.

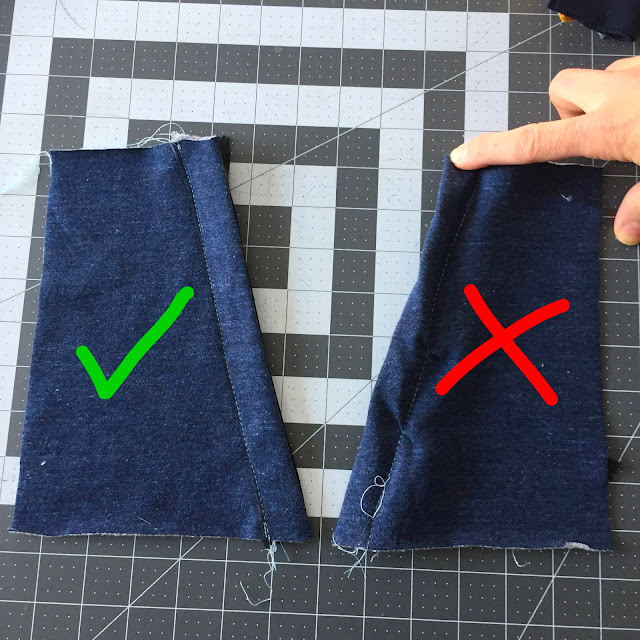
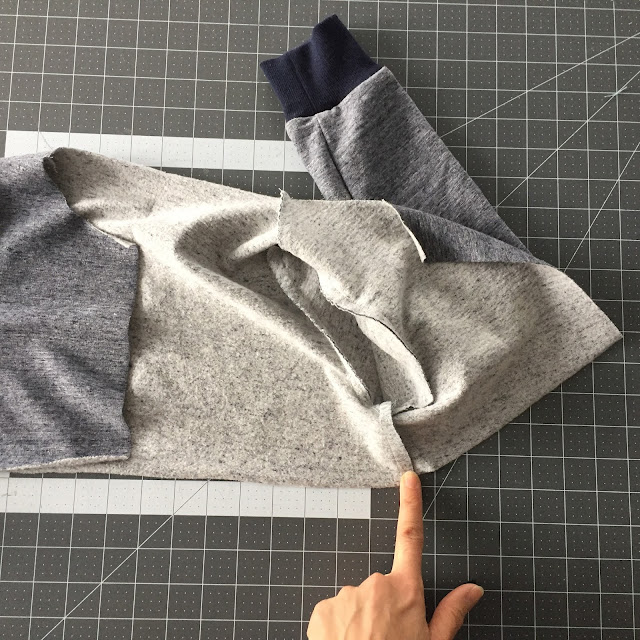
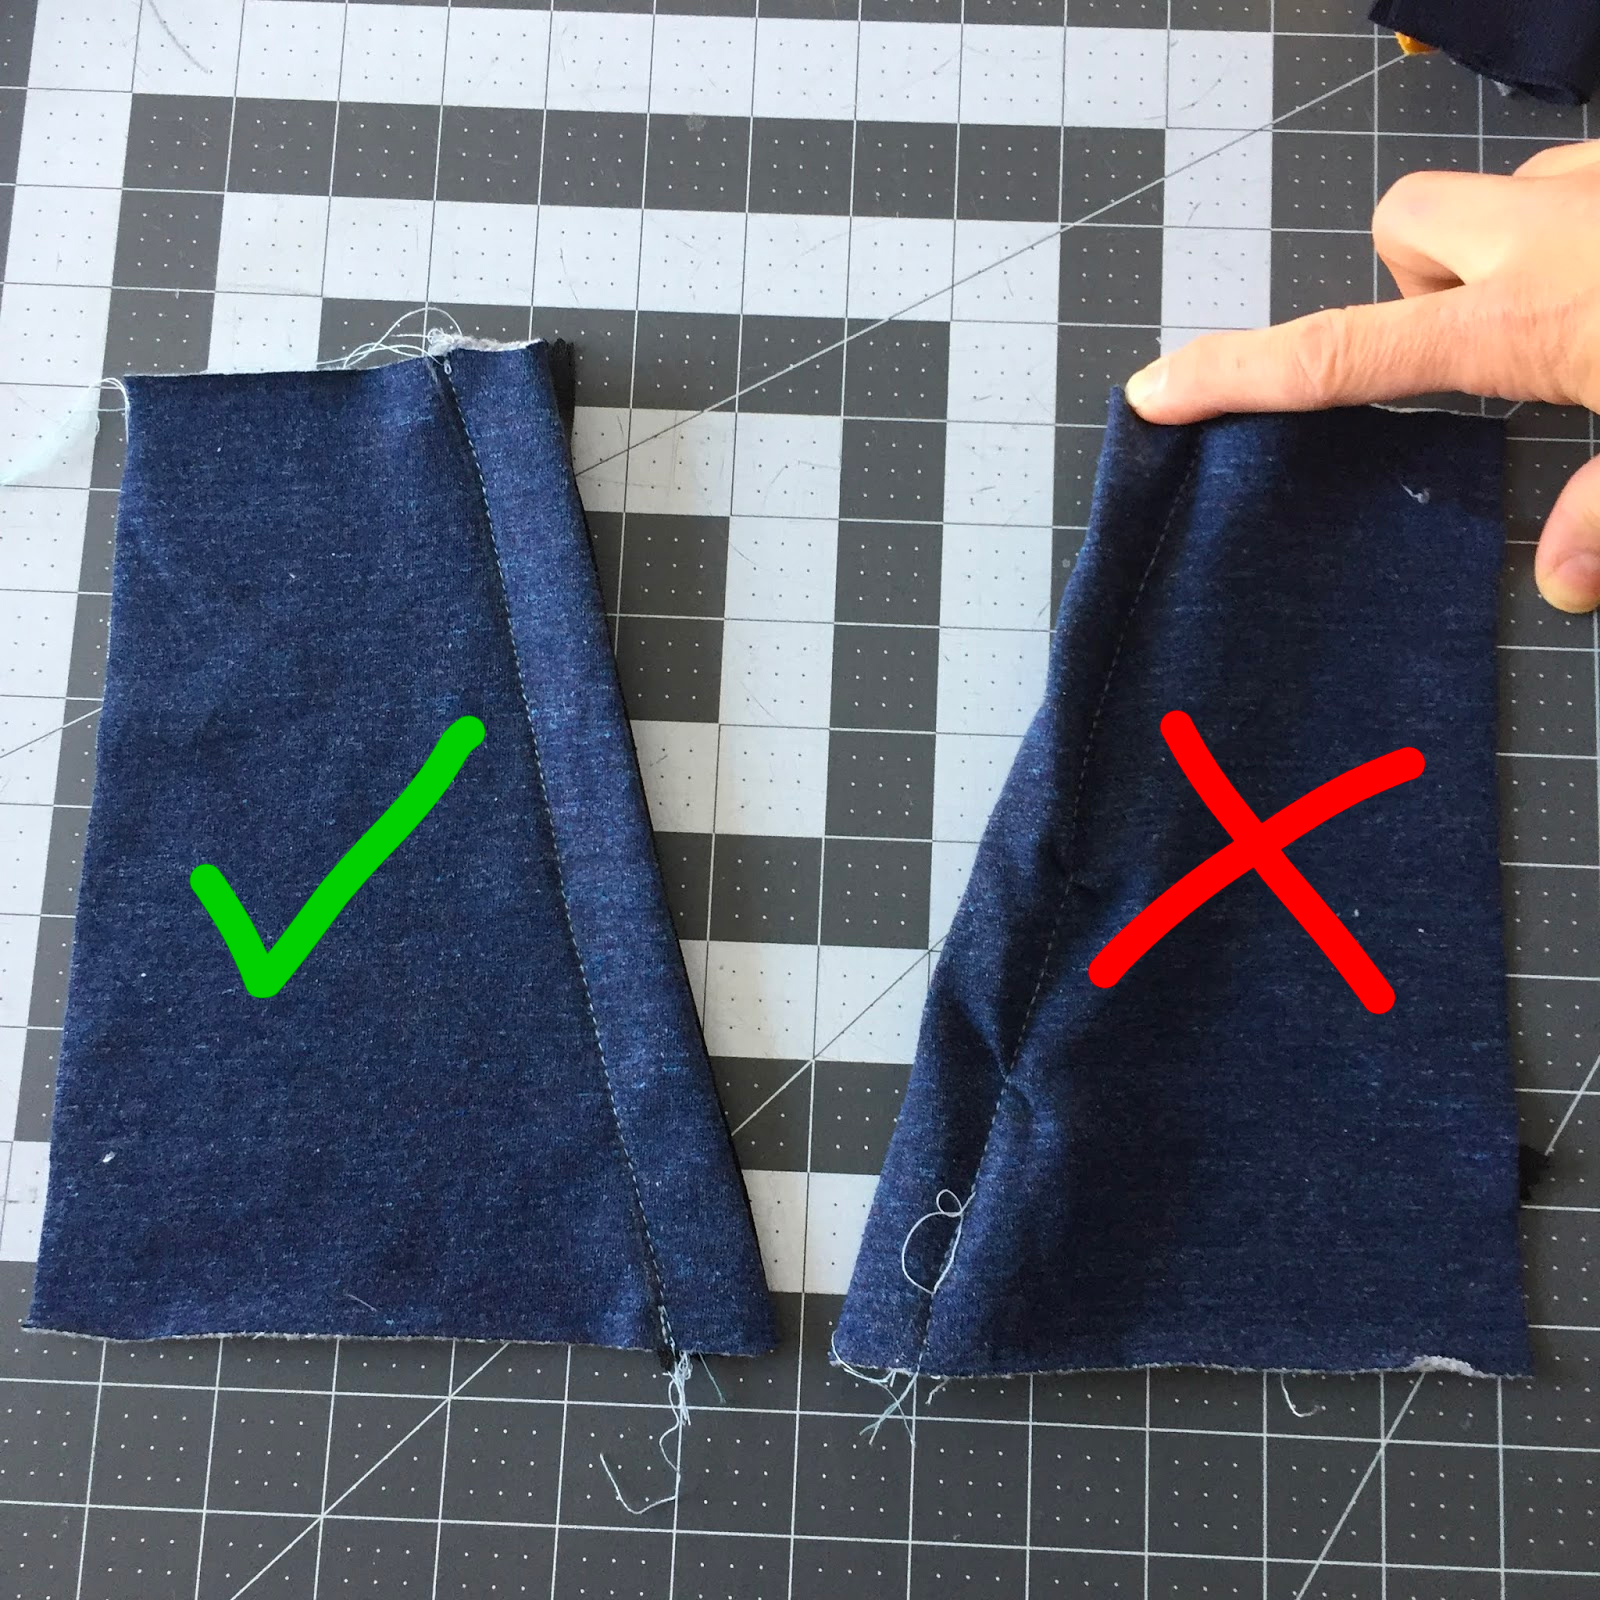
Then, fold the pocket a the fold line so the zipper is under the pocket, hidden by the fold. It's now time to topstitch. Don't rush it or you might end up with something like the photo on the right. It is important to pin, trace and go slowly for topstitching that is nice and straight.
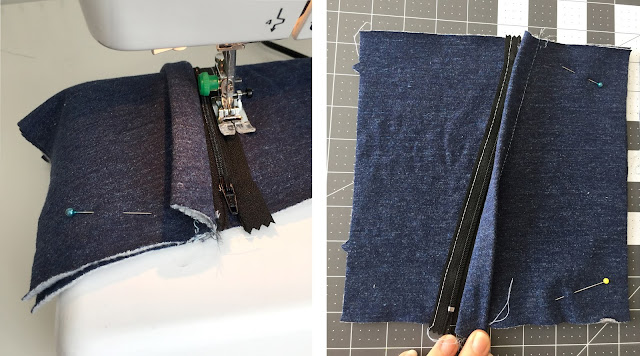
As shown in the instructions, stitch with the wrong side of the pocket facing up. Tracing the topstitching line on both pieces will ensure you have the same width on both sides. As you sew, don't forget to stop, needle down, pull the cursor down passed the needle and keep sewing. If you are not using a narrow zipper foot on your machine, sewing next to the cursor will make you swerve.

After one side of the zipper is sewn to the pocket, it is time to sew the other side to the lower front. Trust the pattern. Yes. It's wrong side of zipper on right side of the fabric :) Pin the layers so everything is nicely aligned and nothing moves when you sew:
For this tutorial, we are using a contrast thread. We recommend you use a thread of the same color as your zipper. It will be more forgiving. After the free edge of the zipper is sewn to the lower front, assemble front and back pieces and press the side seam allowances towards the back before you attach the hem band.
The lower front, with the pocket topstitched (you stitch across the fold at step 10 of the instructions).
ABOUT THE ZIPPER LENGTH:

IMPORTANT: If you are a beginner, follow to the regular instructions.

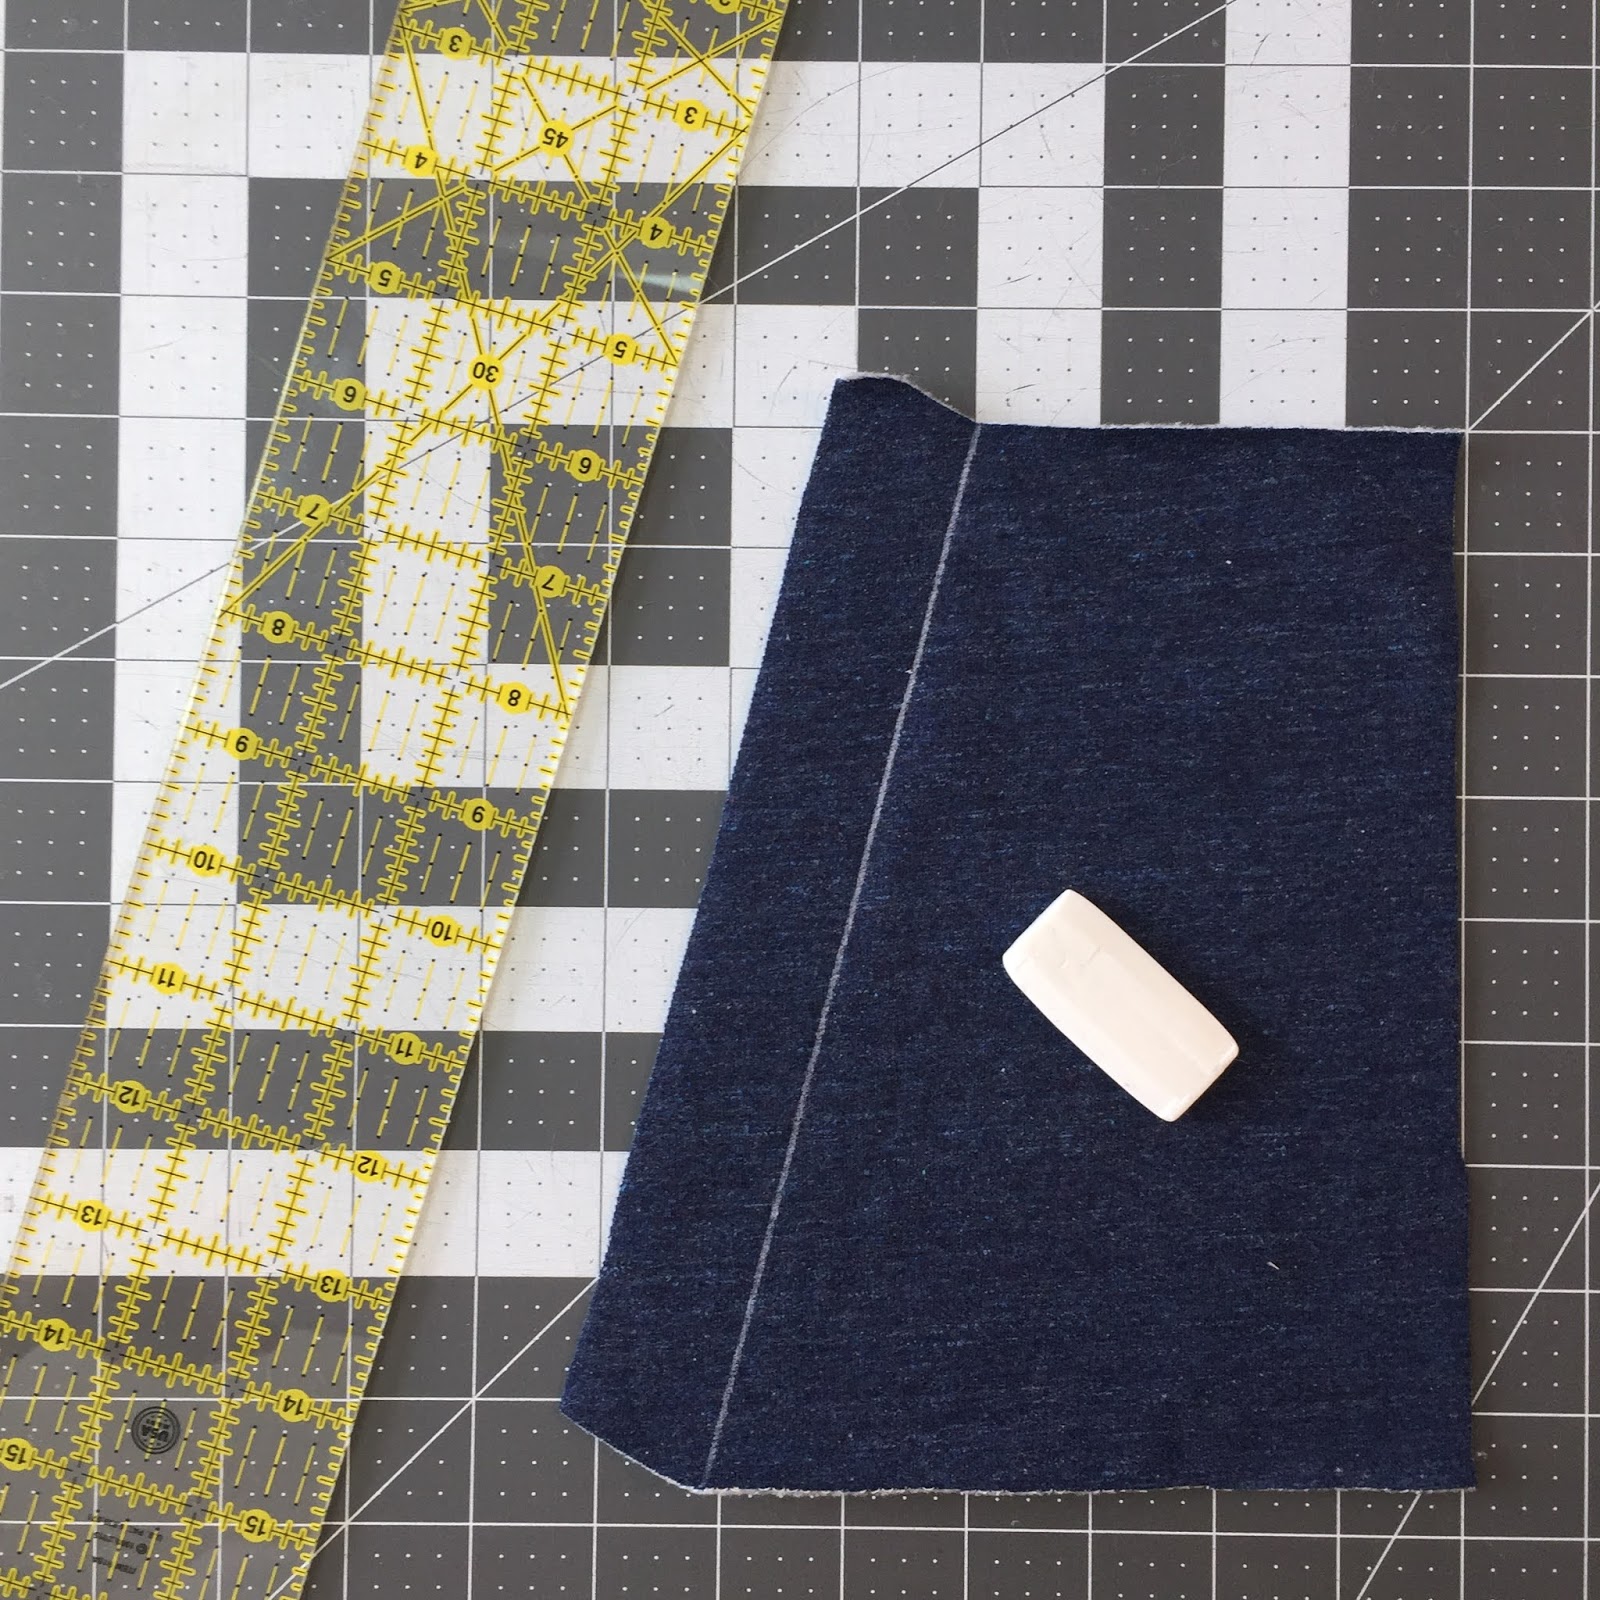
First, let's talk about seam direction. It is a good habit to press your seams and pick a direction, the same direction for both sides (left and right).
For example, when sewing the upper front to upper back at shoulder seam, press the seam allowance towards the back:

When seams intersect, press connecting seams in opposite directions. When you pin, it will stay flat and the seams will easily stay together.
When sewing lower front to lower back, press seams towards the back (step 11 of the instructions). For the upper part of the garment, press side seams towards the front (step 16).
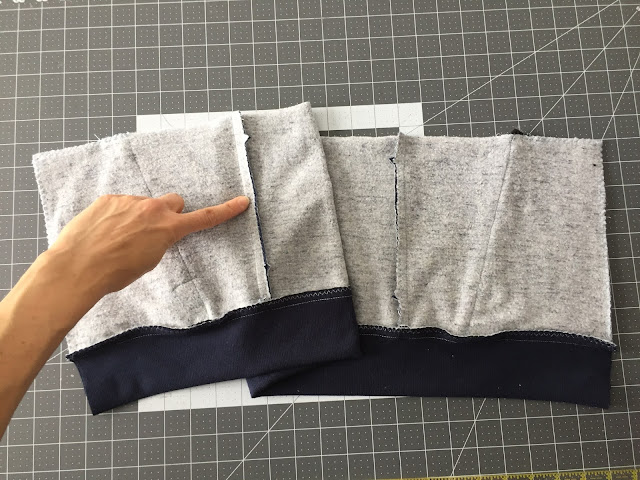
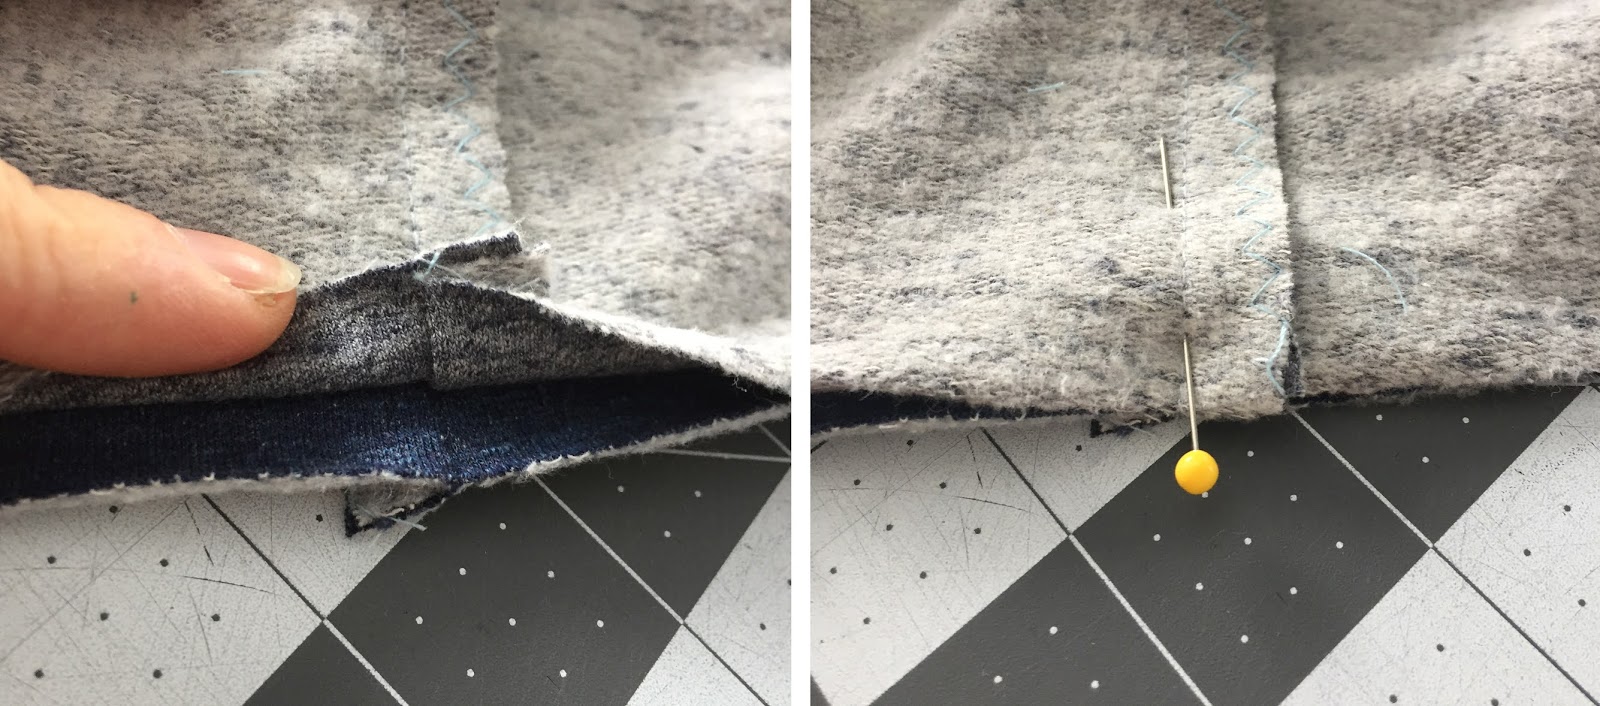
When you pin upper and lower sections together, match seams and stitch:

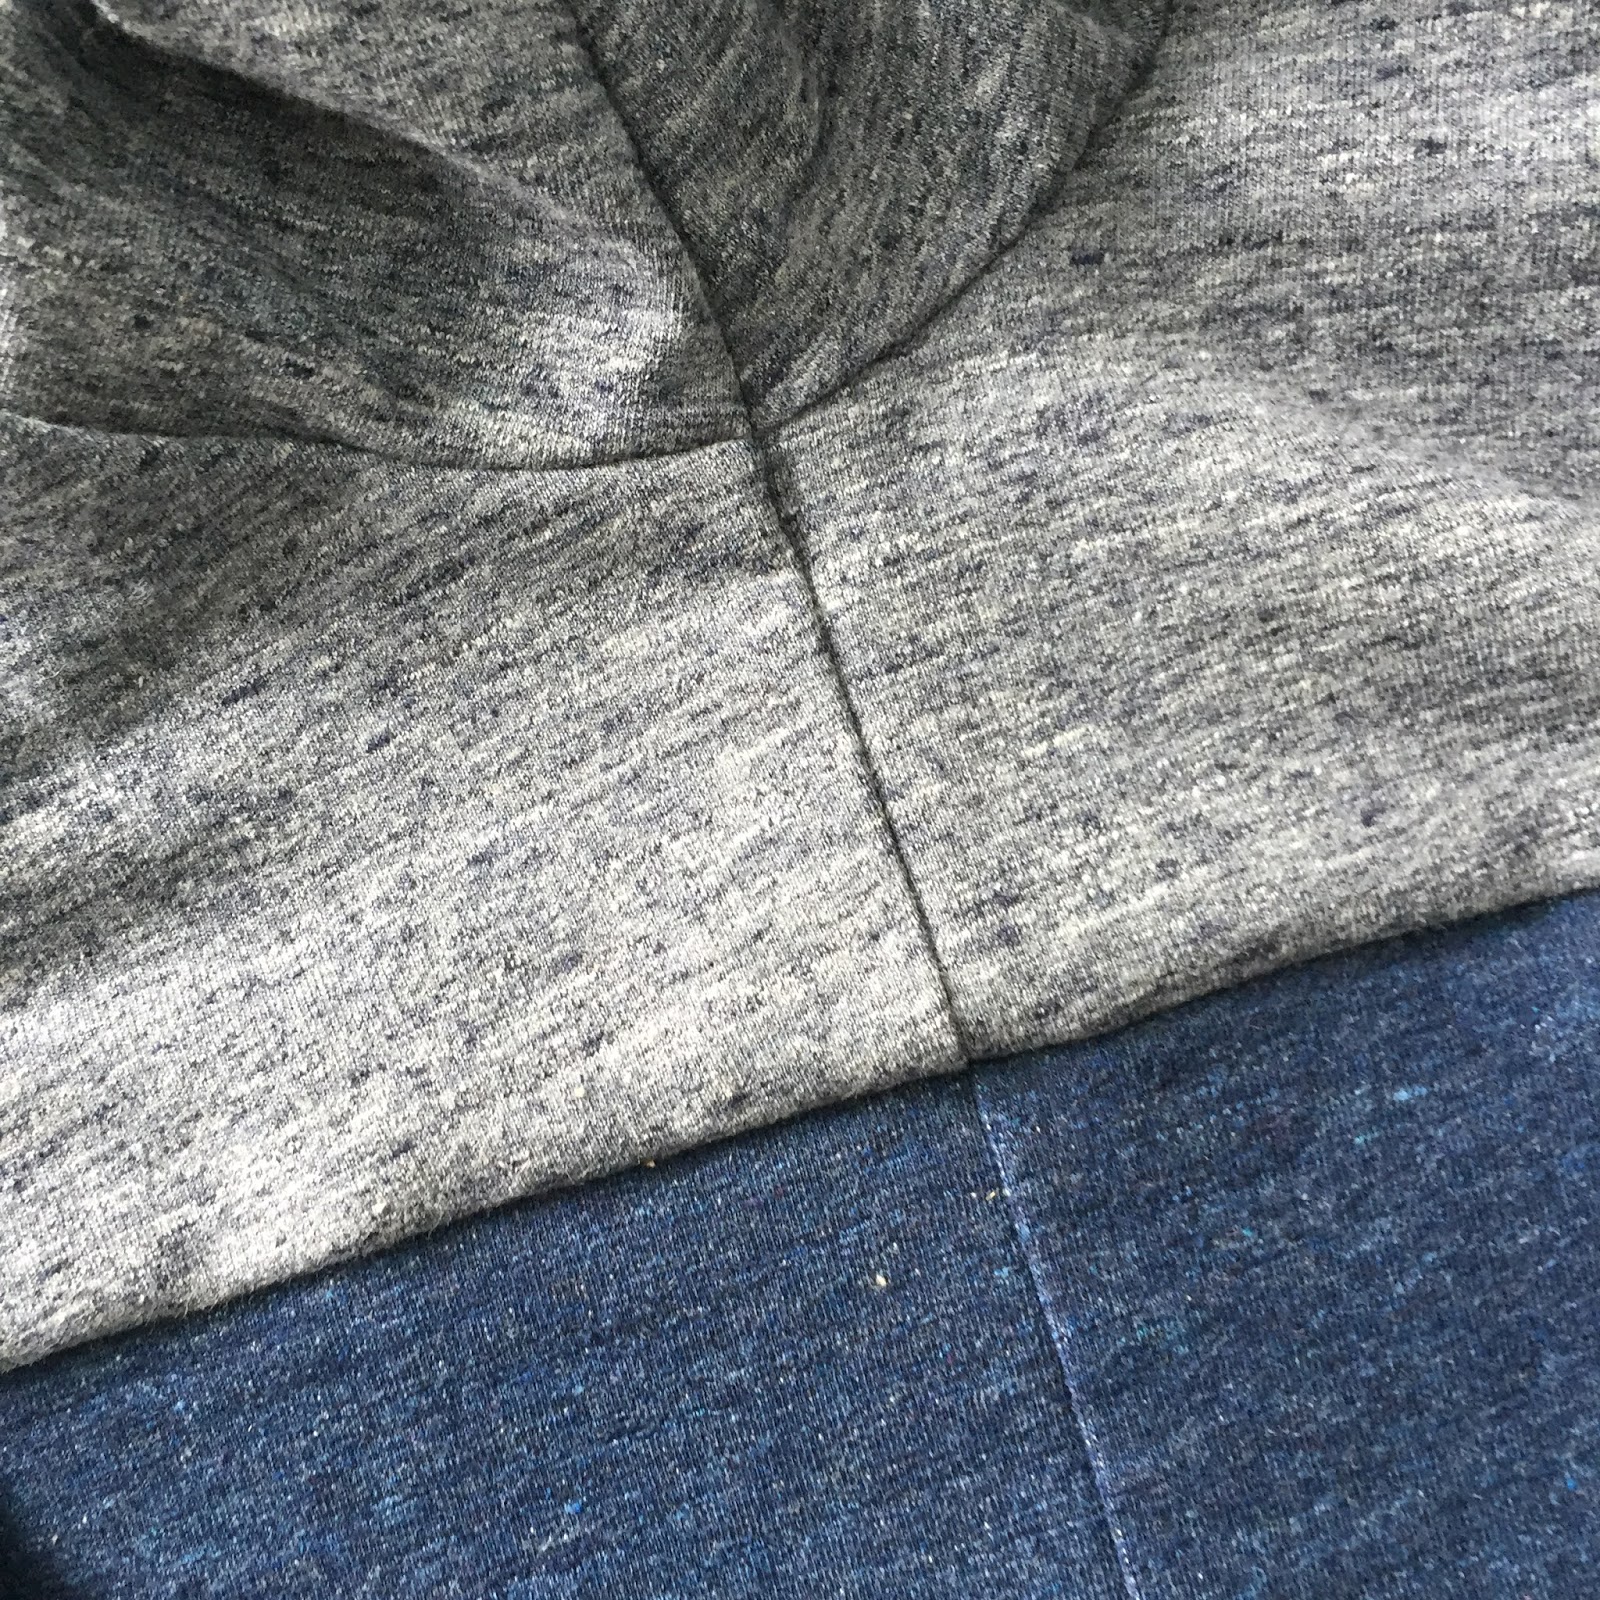
Stitch only a small section, check the result on the right side and then keep going. It should look as neat as this:

In the next post, we will show you how to line the hood and finish with a binding, how to sew the front zip and how to make fabric drawstring. Stay tuned!

With this tutorial, we want to give you the confidence you need to tackle this project. If you take your time and use the tips and tricks in this tutorial, everything should go well and you will be sooo proud of the finished garment!

The pattern includes 27 sizes for boys and men. Women can make it too of course! If you like hoodies that go straight down from the bust, you will love this style.

In this first post, we will highlight some techniques that require more dexterity and preparation. They are not complicated but you do have to take your time.
We wanted this to be accessible to as many people as possible so we will used a regular sewing machine for all the steps. Everything is done with straight stitch and zigzag.
In this post, we will see how to:
- KEEP TRACK OF YOUR MAKES AND STAY ORGANIZED
- MAKE ZIPPERED KANGAROO POCKETS
- KEEP SEAMS LINED UP
Please note that complete sewing instructions are available on the website, on the FREDERIC HOODIE page (under "instructions and tutorials"). You can access them at any time, before and after you purchase the pattern. We will refer to the steps throughout the tutorial

KEEP TRACK OF YOUR MAKES AND STAY ORGANIZED
PROJECT BOOK. Go with a notebook and pencil. Keep it simple. It's the key if you want keep that kind of "sewing resolution". No printout that you run out of, no need to go online and get distracted by fabric sales... No excuses :)For EACH project, we log the vital information. This way, when you pull out your Jalie pattern to make a new piece because your child outgrew the first one, you will know exactly what you did and have info about the fabrics you used and alterations you made a while ago.
- Pattern used
- Size used (it is good to keep dates on your measurements too!)
- Where the fabric comes from
- Issues / difficult steps / not to self for next time
- How the garment fits / How happy you are about it
This log book is not only a great way to keep track of everything but is will also be a reminder of every you made. You will be filled with pride when you reach the last page and need a new notebook!
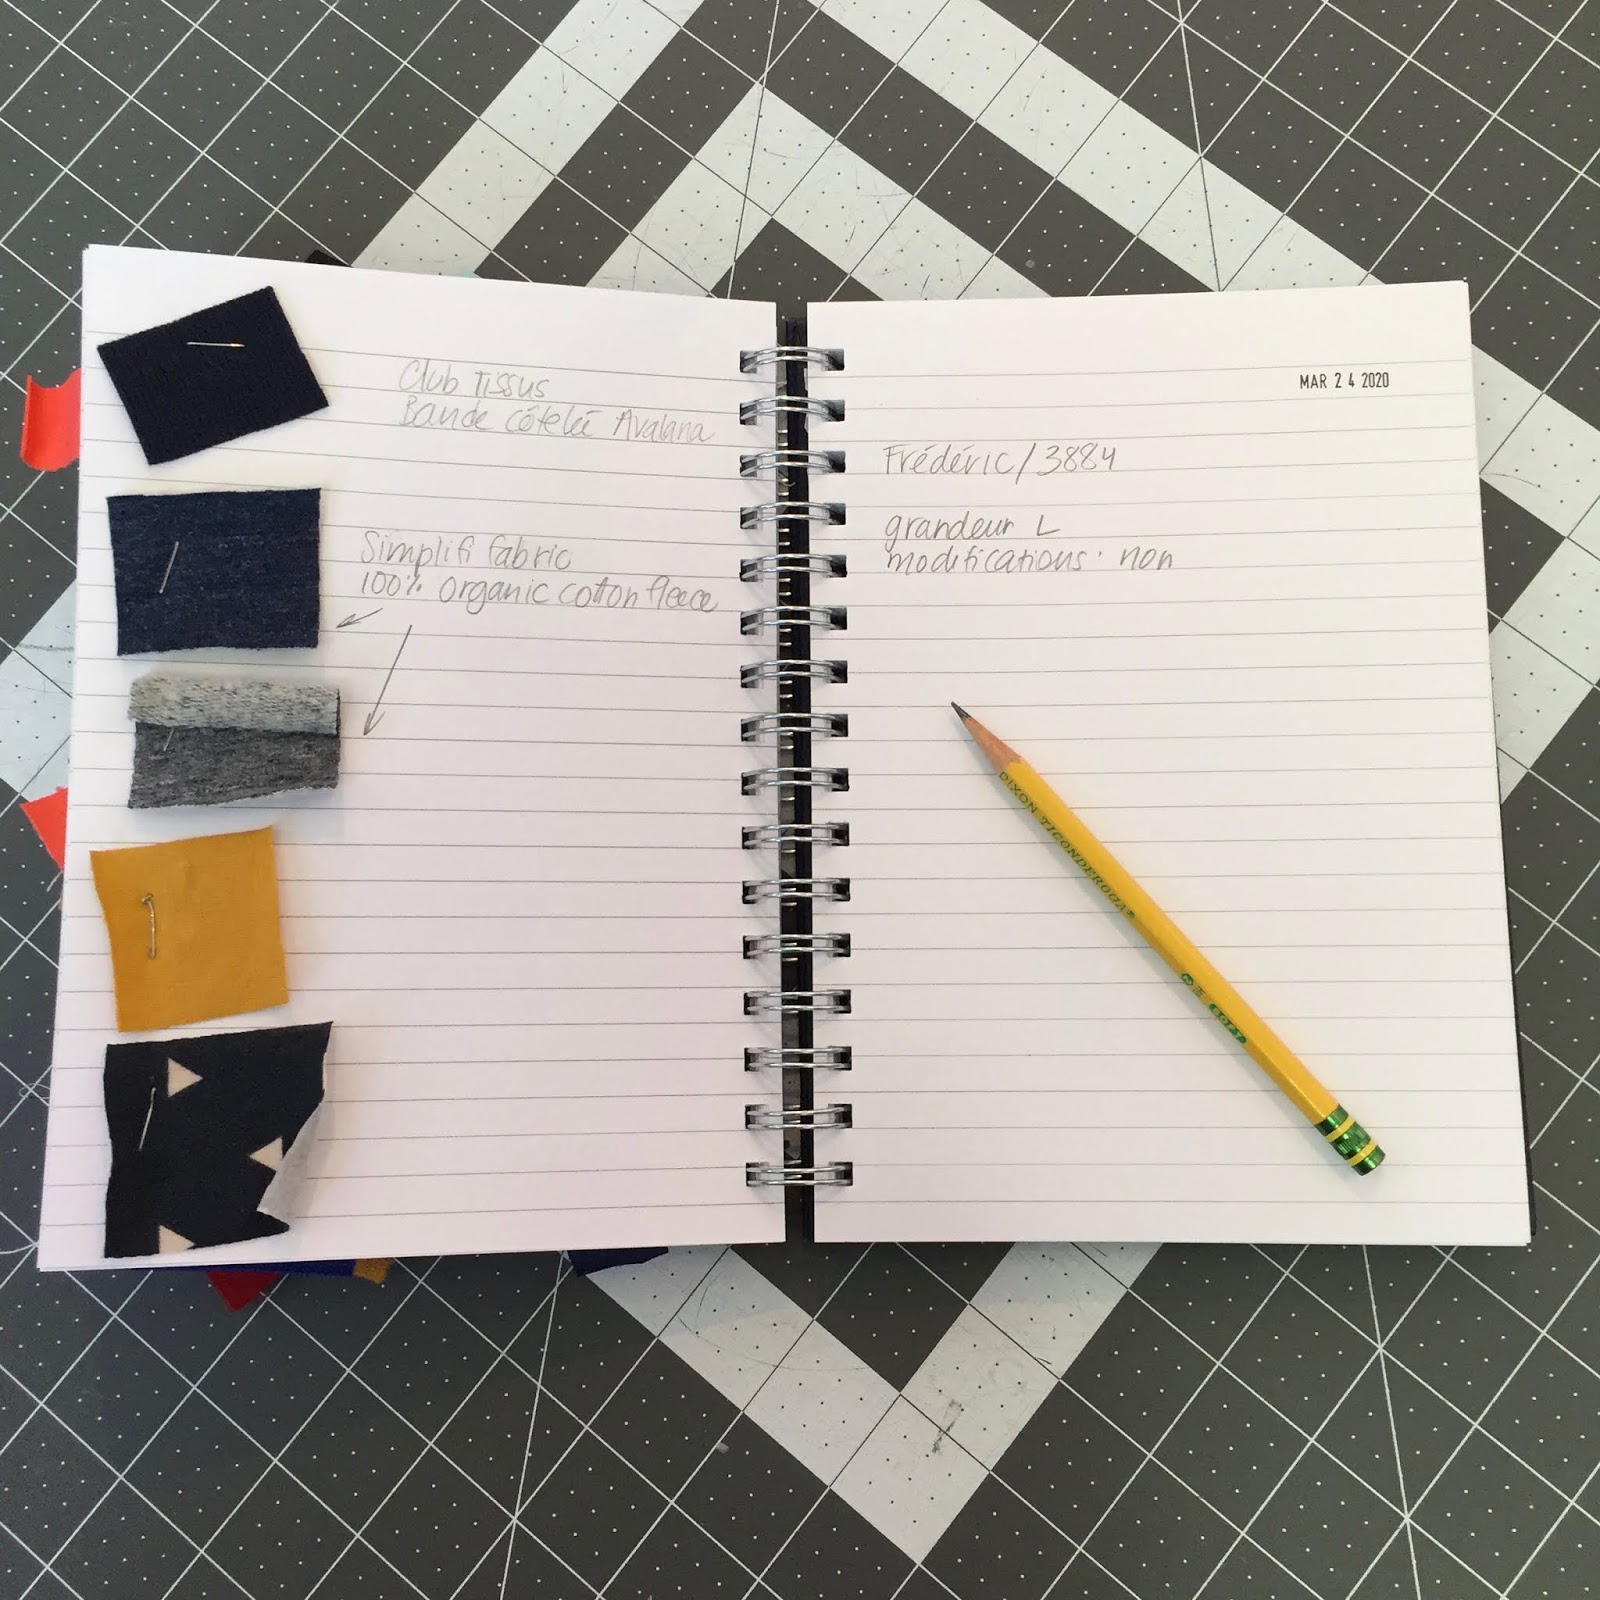
For the FREDERIC, you can play with different fabric weights and textures. Our favorite is fleece or stretch fleece as main fabric, jersey for the hood lining and binding, rib knit for the cuffs. Have fun with color blocking!
We write the date on the pattern pieces and punch a hole to hang the pattern on a rod at the studio, using a pattern hook:
MAKE ZIPPERED KANGAROO POCKETS
The zipper application technique for the FREDERIC pockets is a bit unusual, but not complicated. We wanted the zipper to be covered (so that if your stitching is not perfect no one would notice) but did not want to go with a welt technique. You will only see the zipper tape when hands are in the pockets. You can go with a zipper tape of the same color as the fabric or have fun and use it to add a pop of color.
First, mark and press the pleat on the right side of the pocket (step 3 of the instructions). The pleat will be your guide when sewing your zipper:
Pin your zipper, face down, along the edge of the fabric and stitch.

Then, fold the pocket a the fold line so the zipper is under the pocket, hidden by the fold. It's now time to topstitch. Don't rush it or you might end up with something like the photo on the right. It is important to pin, trace and go slowly for topstitching that is nice and straight.
As shown in the instructions, stitch with the wrong side of the pocket facing up. Tracing the topstitching line on both pieces will ensure you have the same width on both sides. As you sew, don't forget to stop, needle down, pull the cursor down passed the needle and keep sewing. If you are not using a narrow zipper foot on your machine, sewing next to the cursor will make you swerve.

After one side of the zipper is sewn to the pocket, it is time to sew the other side to the lower front. Trust the pattern. Yes. It's wrong side of zipper on right side of the fabric :) Pin the layers so everything is nicely aligned and nothing moves when you sew:

For this tutorial, we are using a contrast thread. We recommend you use a thread of the same color as your zipper. It will be more forgiving. After the free edge of the zipper is sewn to the lower front, assemble front and back pieces and press the side seam allowances towards the back before you attach the hem band.

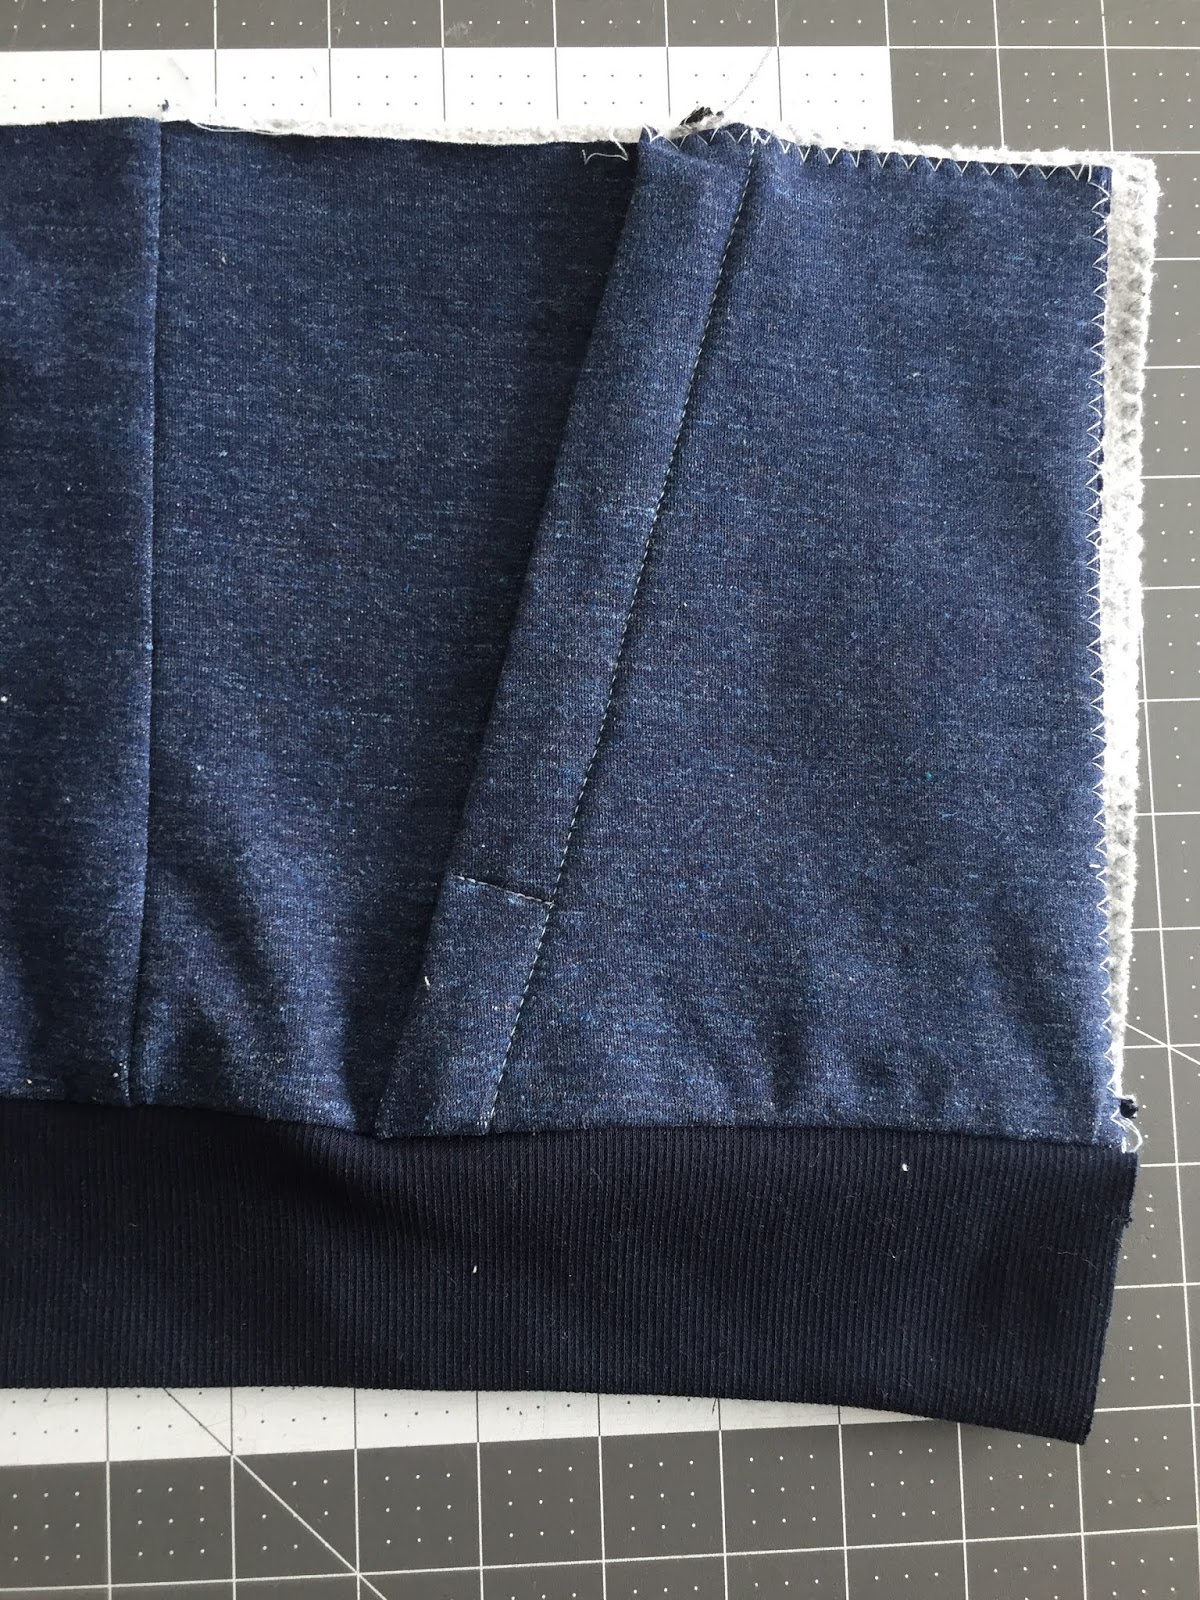
The lower front, with the pocket topstitched (you stitch across the fold at step 10 of the instructions).
 |
ABOUT THE ZIPPER LENGTH:
Ideally, you will work with a zipper that is longer than the lower front piece (the length we indicate on the back of the pattern). When we gathered supplies for the post before lockdown, we did not have any zipper that were longer than that. If you are in the same situation, be very careful when you sew the hem band. You do not want to stitch over a bottom stop!
BONUS: ALTERNATE SEWING METHOD FOR MORE ADVANCED SEWISTS
You want your visible zipper to be a bit narrower? You can fold it under and topstitch down, using a zipper foot. This technique is more difficult (especially when you are sewing with one hand and filming with the other #lockdownsewingtechnique, but feasible.
IMPORTANT: If you are a beginner, follow to the regular instructions.
KEEP SEAMS LINED UP
This next tip applies to any garment with crossing seams. It is the first thing we look at when we turn something right side out. There is an easy way to make sure seams line up and it is quite simple, you'll see.First, let's talk about seam direction. It is a good habit to press your seams and pick a direction, the same direction for both sides (left and right).
For example, when sewing the upper front to upper back at shoulder seam, press the seam allowance towards the back:

When seams intersect, press connecting seams in opposite directions. When you pin, it will stay flat and the seams will easily stay together.
When sewing lower front to lower back, press seams towards the back (step 11 of the instructions). For the upper part of the garment, press side seams towards the front (step 16).

When you pin upper and lower sections together, match seams and stitch:
Stitch only a small section, check the result on the right side and then keep going. It should look as neat as this:
In the next post, we will show you how to line the hood and finish with a binding, how to sew the front zip and how to make fabric drawstring. Stay tuned!
← FREDERIC HOODIE // TIPS AND TRICKS - PART 2/2 Racerback COCO Sports Bra // Step-by-step Tutorial →