 Skip to content


BOBBIE V-NECK TOP // Color block and construction
Today, we will have fun with the BOBBIE pattern! This minimalist top is the perfect blank canvas to create amazing color blocking for a unique garment or to use small fabric remnants in your stash.
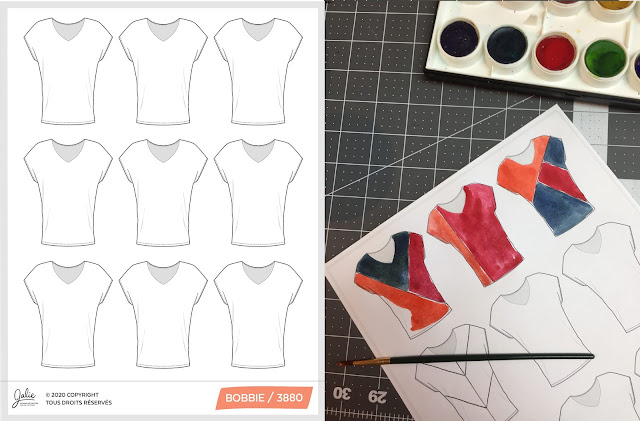
We call the BOBBIE pattern the "magic v" top because its facing not only creates a clean finish but also helps keep the neckline close to the body thanks to its cropped cami shape. It also covers the bra at the armhole at the same time:
 The pattern includes 28 sizes (girls and women) and is available in paper and PDF formats. The PDF version is a 19-page printout you can print at home and includes an A0 copy shop file as well as a PDF file edited for projectors. All PDF files are layered, which means you can print one layer at a time if you want to skip tracing.

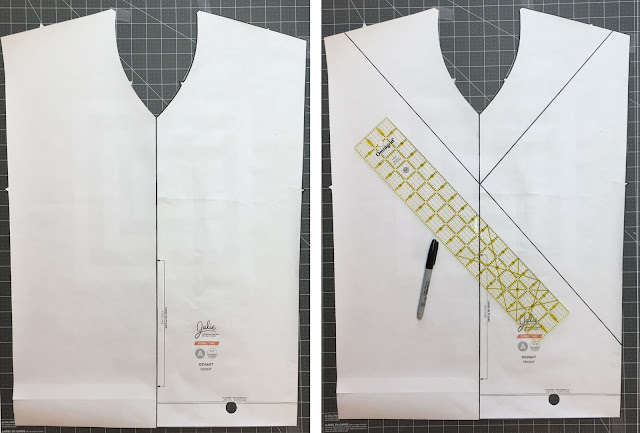
If you are making an asymmetrical design (not the same thing left and right), trace your front piece twice and place the second piece at the fold line to create an open front piece. Transfer your design onto the open front pattern piece:
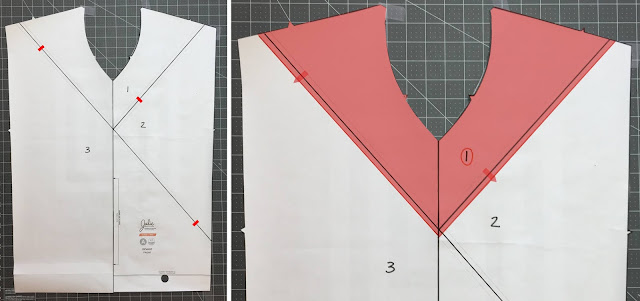
 These thick lines will be the seams. In order to assemble those sections together, you will need seam allowances.
Draw lines, 6 mm (1/4'') from and parallel to the seam lines. The outer line will become the cutting line (raw edge of your fabric) for each piece.
To make assembly easier on those long diagonals, you may want to add marks or notches (triangle going outwards) at approximately 1/3 of the distance, at the red marks on the images below:
Create all the pieces, making sure you use the thin line OUTSIDE the thick seam line as the cutting line.
We transferred the seam line onto the pieces on the next images so you can visualize the integrated seam allowances on all front pieces.
You are running out of fabric or can't find knit fabric in the color/print/thickness you want at your local fabric store? Upcycle an old t-shirt or go through the clearance racks at clothing stores. You can sometimes find gems at very low prices.

We call the BOBBIE pattern the "magic v" top because its facing not only creates a clean finish but also helps keep the neckline close to the body thanks to its cropped cami shape. It also covers the bra at the armhole at the same time:

PREPPING THE PIECES / CREATING YOUR COLOR BLOCK
Determine the seaming you want for your color block and the colors you want to use. We created a downloadable coloring page that you can draw on (or keep your kids busy while you make your Bobbie).If you are making an asymmetrical design (not the same thing left and right), trace your front piece twice and place the second piece at the fold line to create an open front piece. Transfer your design onto the open front pattern piece:

Draw lines, 6 mm (1/4'') from and parallel to the seam lines. The outer line will become the cutting line (raw edge of your fabric) for each piece.
To make assembly easier on those long diagonals, you may want to add marks or notches (triangle going outwards) at approximately 1/3 of the distance, at the red marks on the images below:

Create all the pieces, making sure you use the thin line OUTSIDE the thick seam line as the cutting line.
We transferred the seam line onto the pieces on the next images so you can visualize the integrated seam allowances on all front pieces.

You are running out of fabric or can't find knit fabric in the color/print/thickness you want at your local fabric store? Upcycle an old t-shirt or go through the clearance racks at clothing stores. You can sometimes find gems at very low prices.
ASSEMBLY
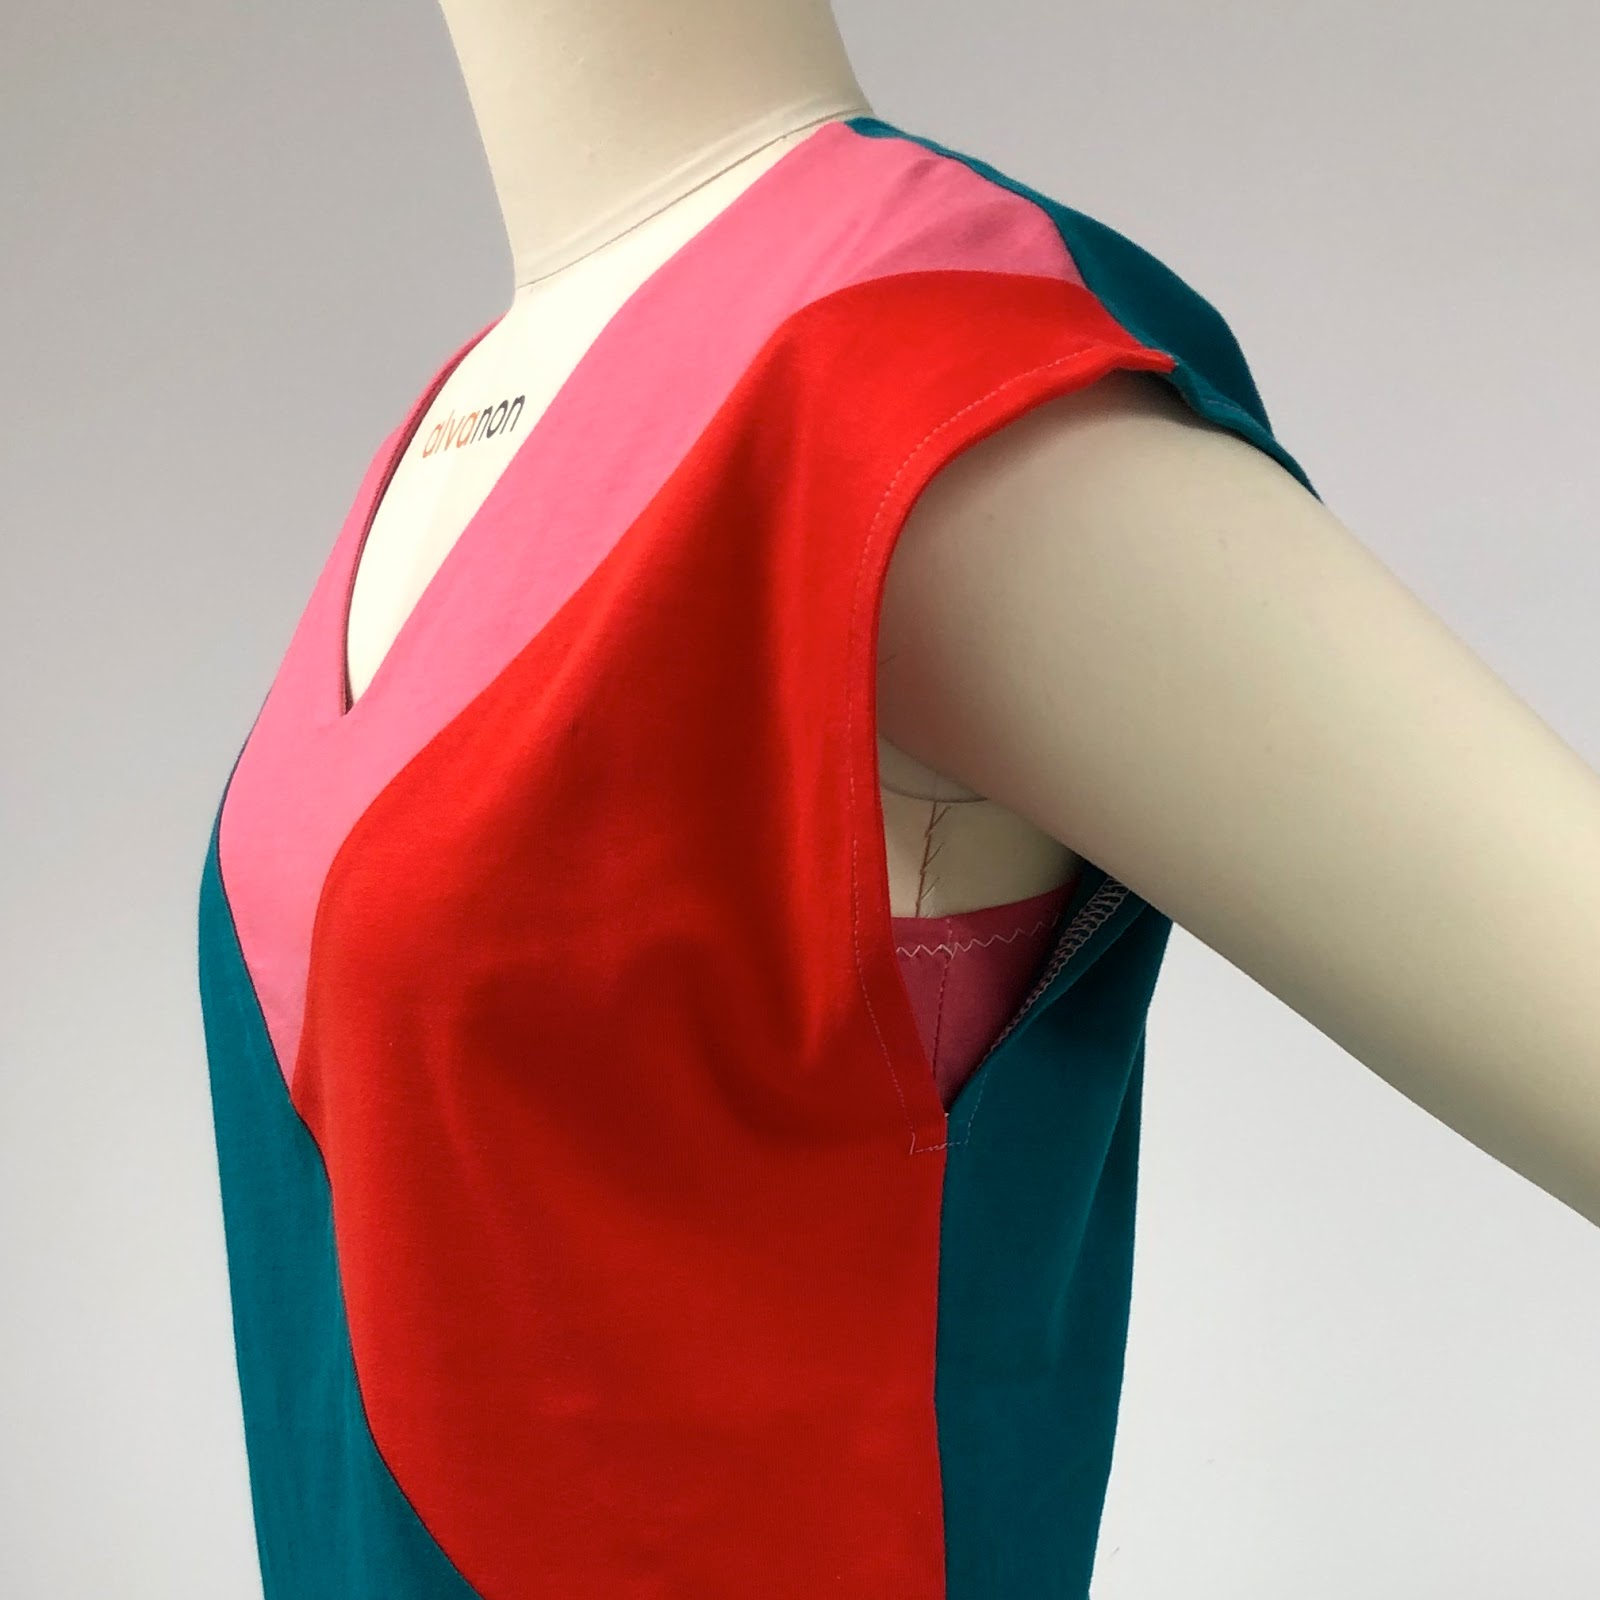
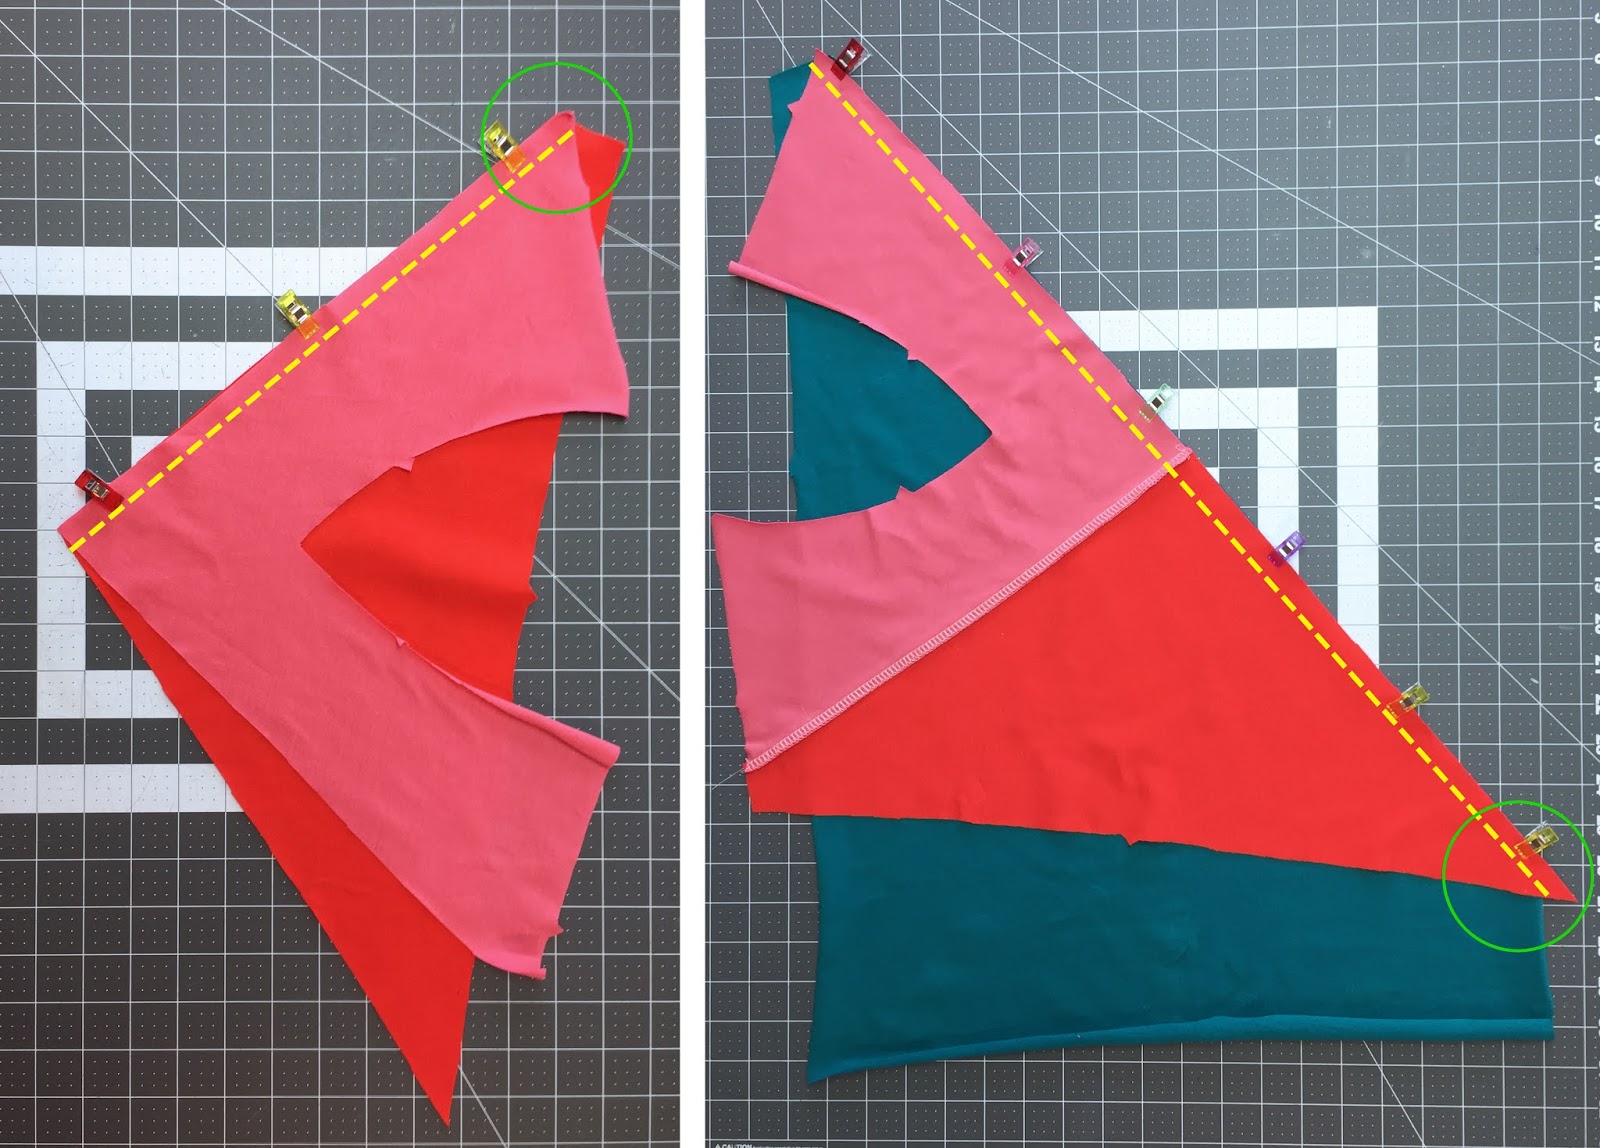
Pin pieces together (in this example, pieces 1 and 2), matching notches/marks and stitch 6 mm (1/4'') from edge WITHOUT STRETCHING THE FABRIC. If your are using a straight stitch, you can use a zigzag (skimming the edge of the fabric) to mimic a serger finish.If you are sewing triangles together like we are doing, it is normal that corners do not line up because the angles at the corners are not the same on the two pieces. The SEAM LINES match, not the CUTTING LINES.
Do not try to align raw edges, let those little corners exceed in order to match the seam lines:
The front is assembled. Pin front to back, right sides together at shoulder seams and stitch WITHOUT STRETCHING THE FABRIC:
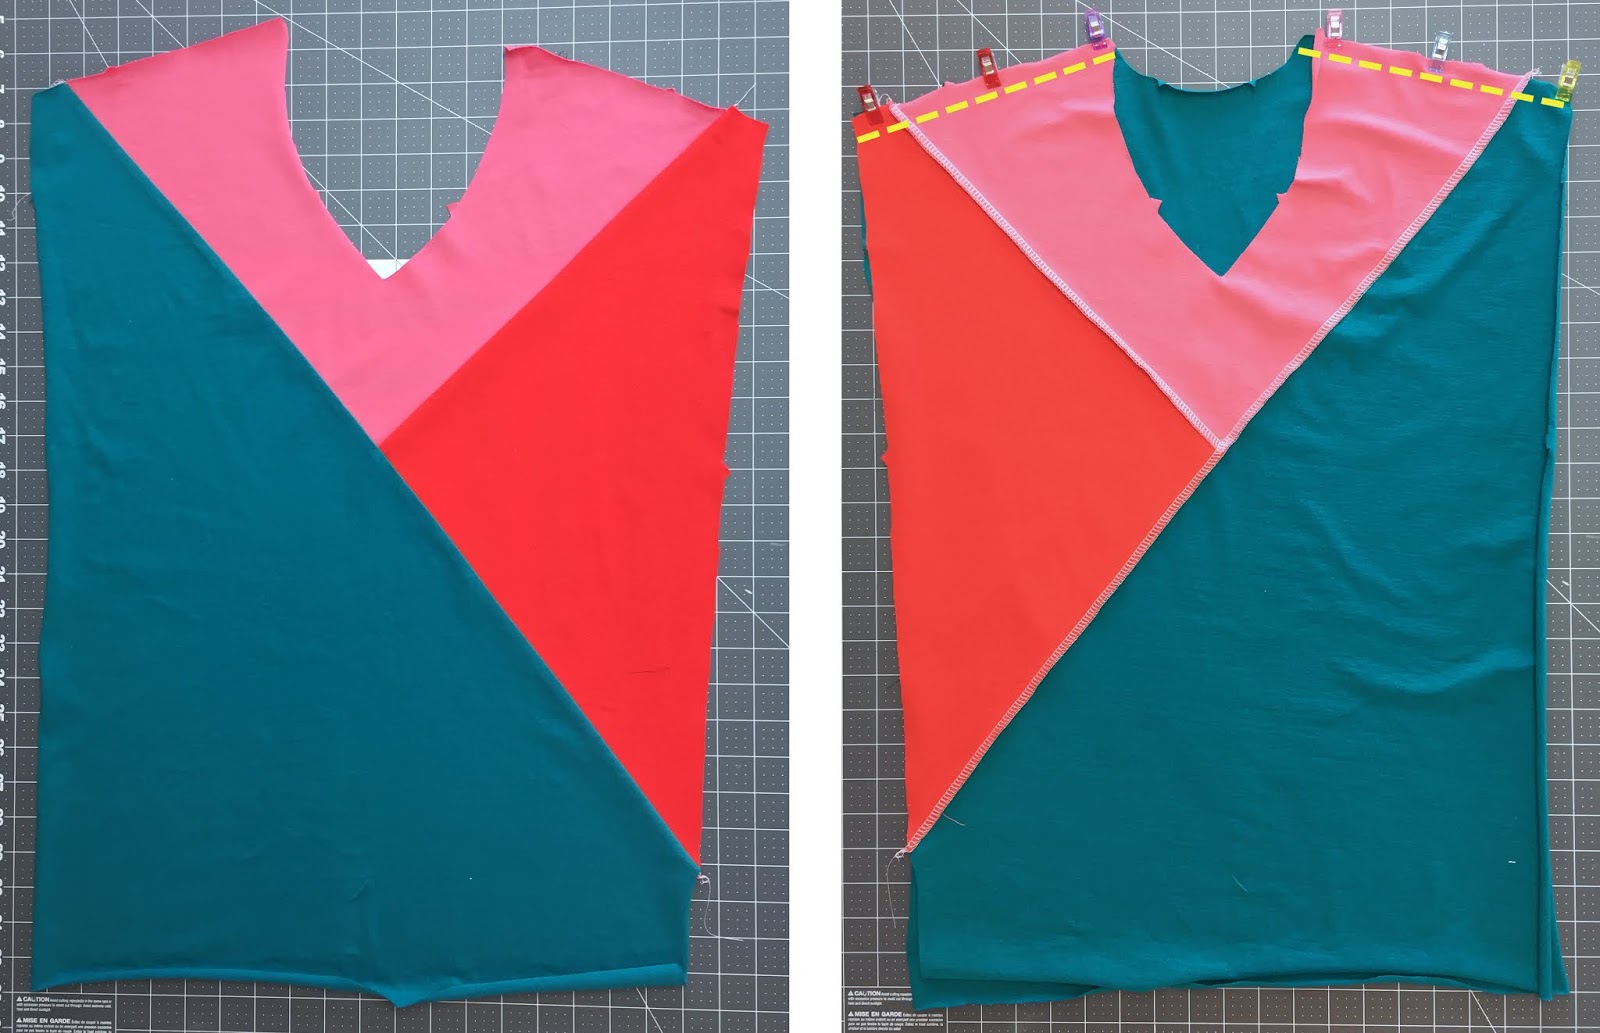
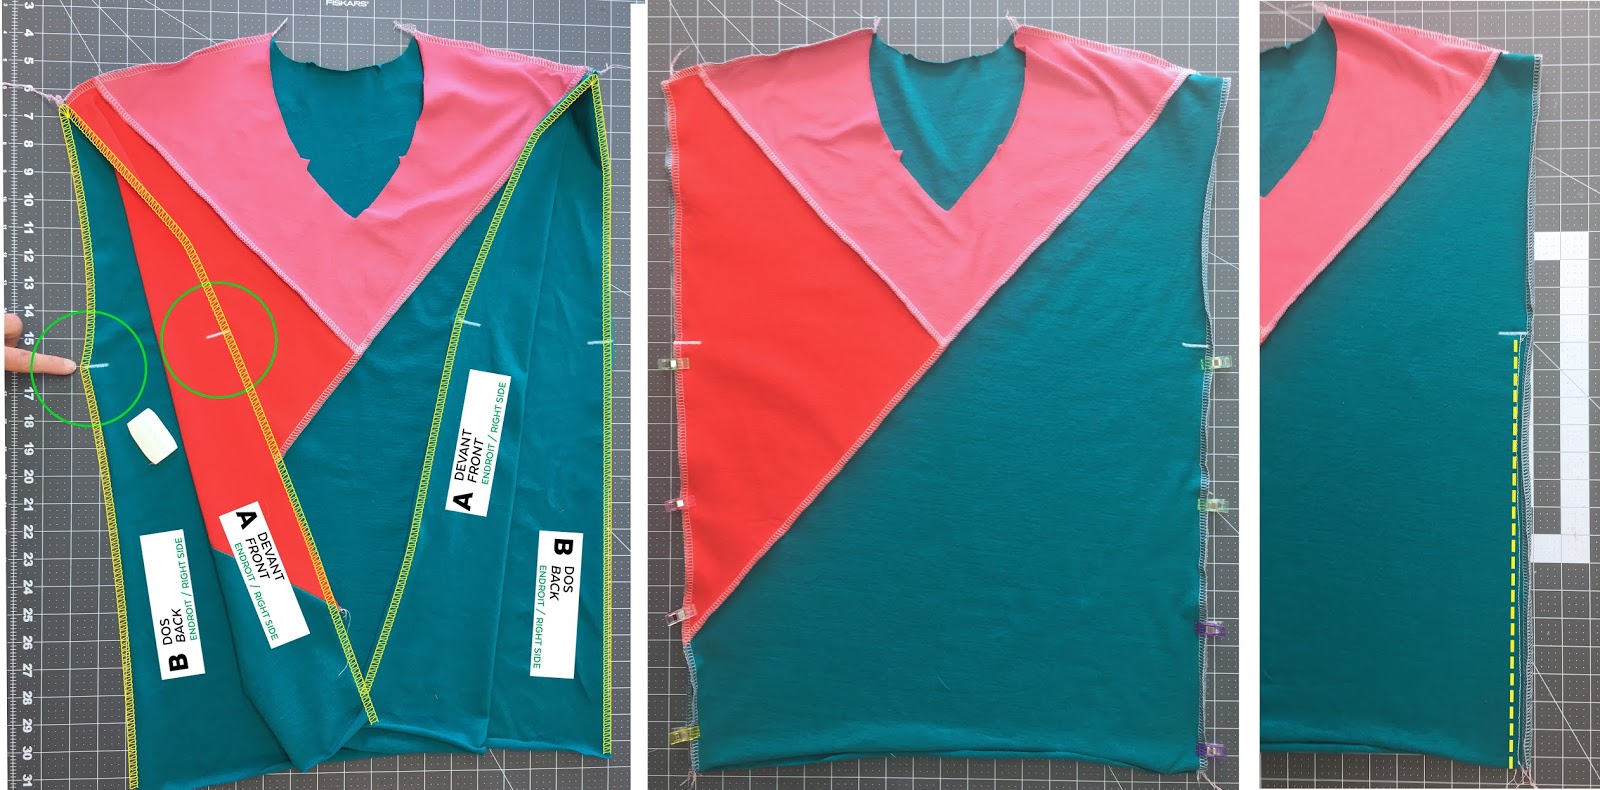
Transfer the notch location at the side seam onto right and wrong side of front and back. Before moving on to the next step, finish the raw edge.
Then, pin front to back and stitch from the mark to the bottom edge, 1 CM (3/8'') FROM EDGE:

FACING ASSEMBLY
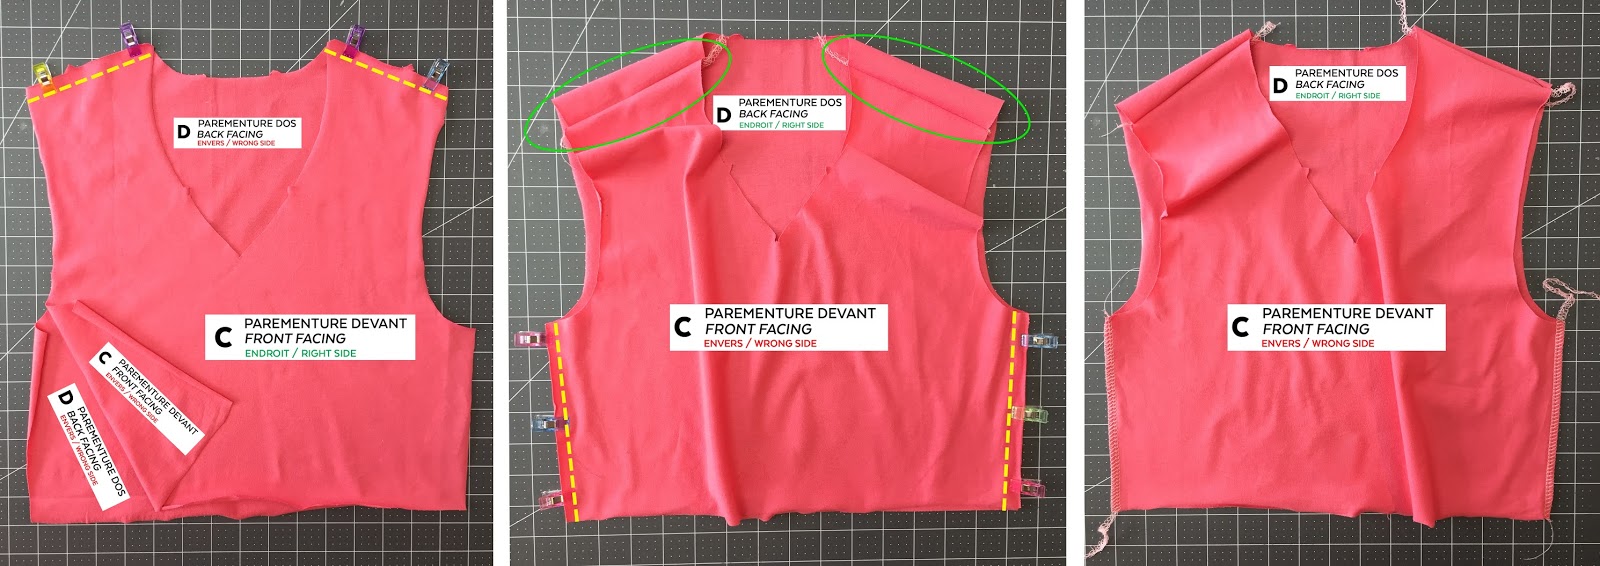
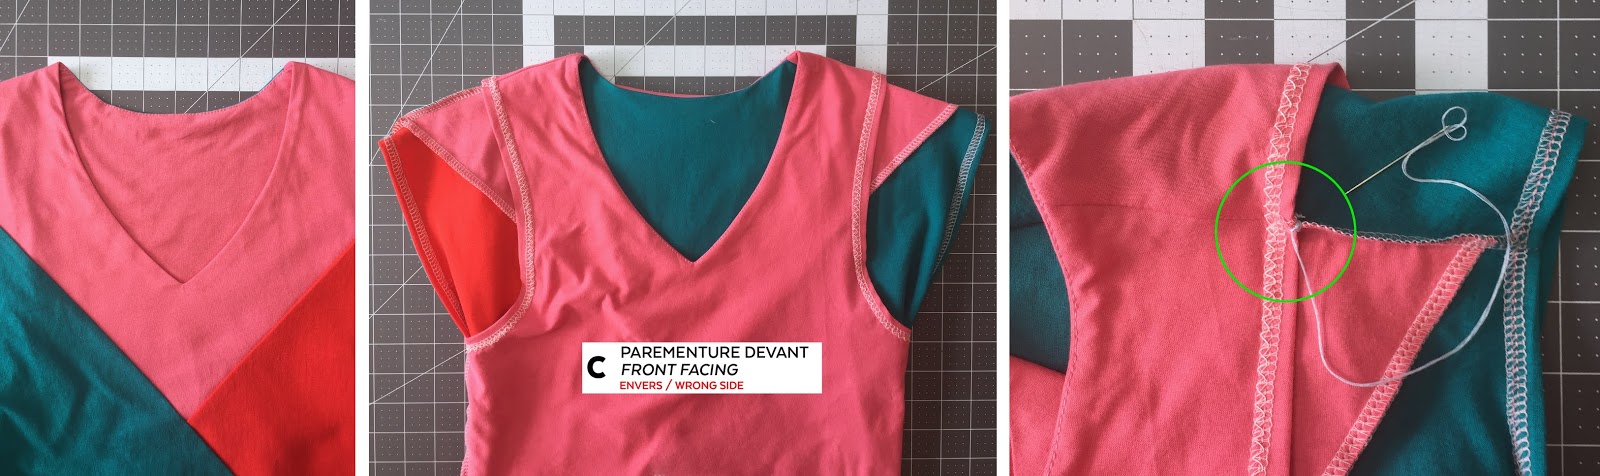
The cami-shaped facing is not assembled the same way you assemble a tank top. Pay attention to RIGHT/WRONG side indications in the next steps.Pin front facing to back facing, WRONG SIDES TOGETHER at shoulder seams and stitch.
Turn wrong side out, pin RIGHT SIDES together at side seams and stitch. Pay attention to the difference between shoulder and side seams in the third image below:
Finish raw edge of armholes and bottom with the serger, fold armhole to wrong side by 1cm (3/8'') and topstitch. We recommend you start and end at the shoulder. This way you will be sure that the topstiching is nice and clean under the arm (no ends, no threads):

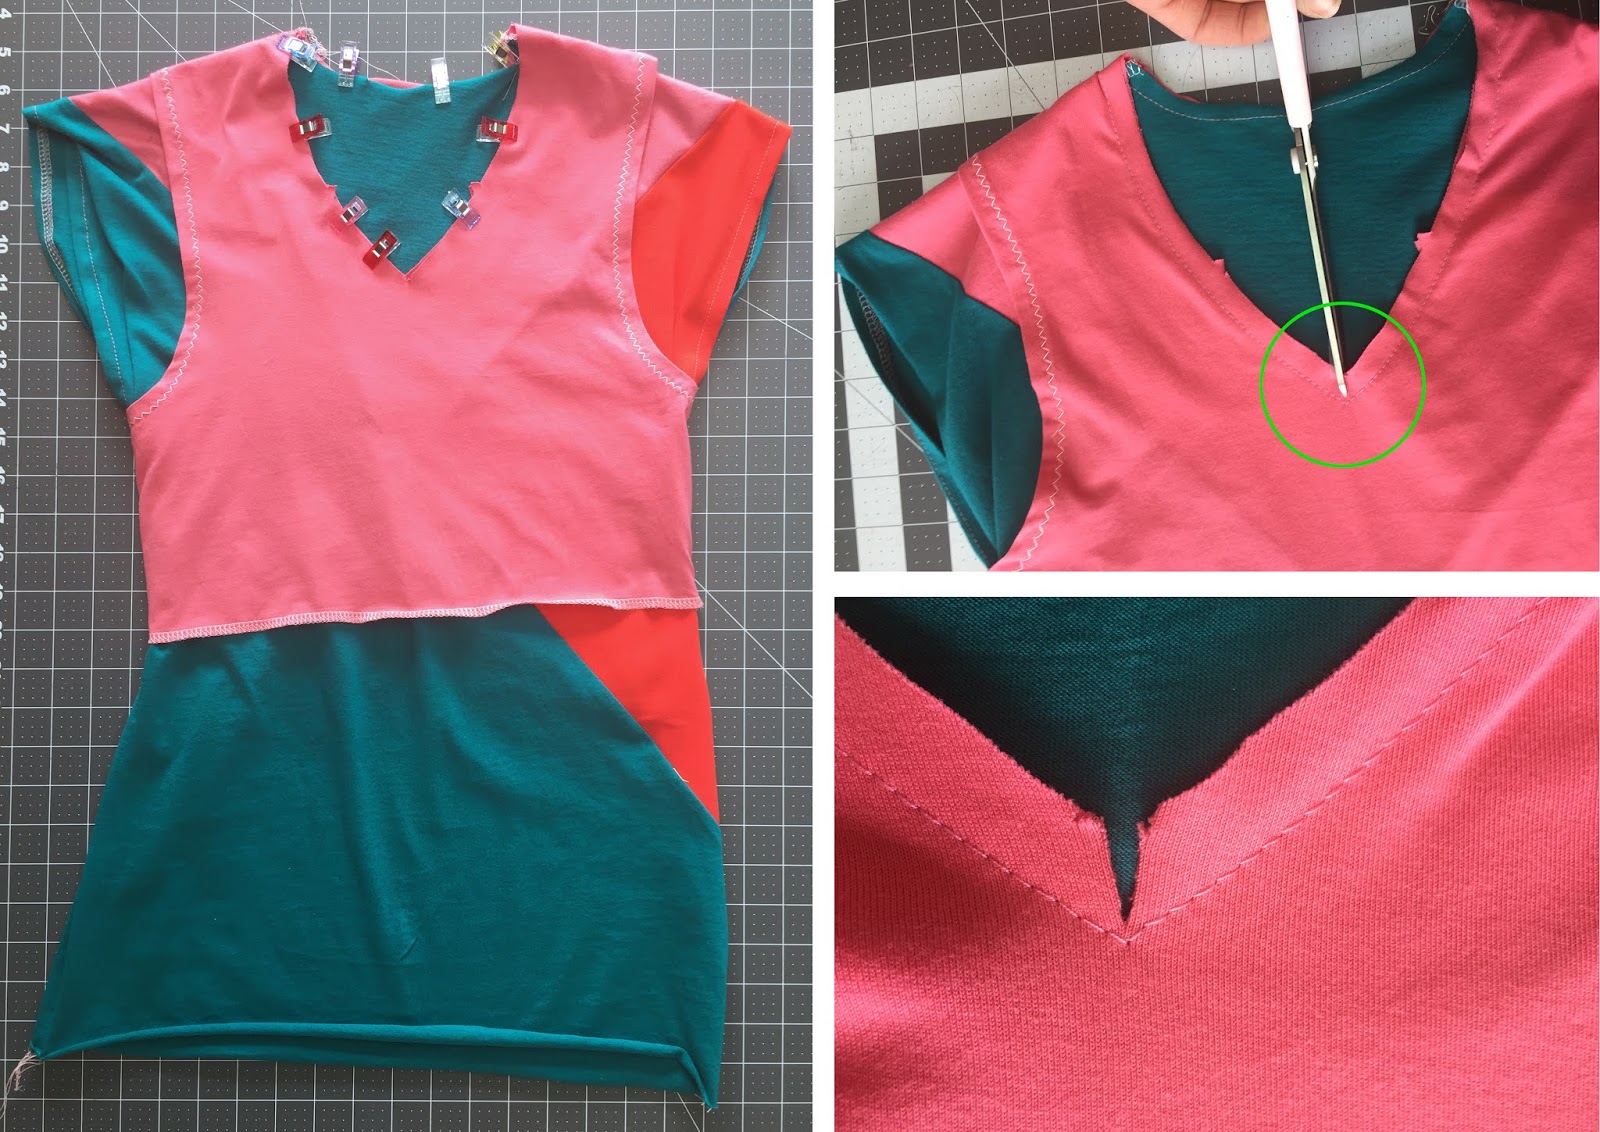
Pin WRONG SIDE of facing to RIGHT SIDE of neckline, matching notches (triangles).
Stitch and pivot, needle down, at the center to have a sharp V in the front. Then, clip the V up to, but without cutting the thread:
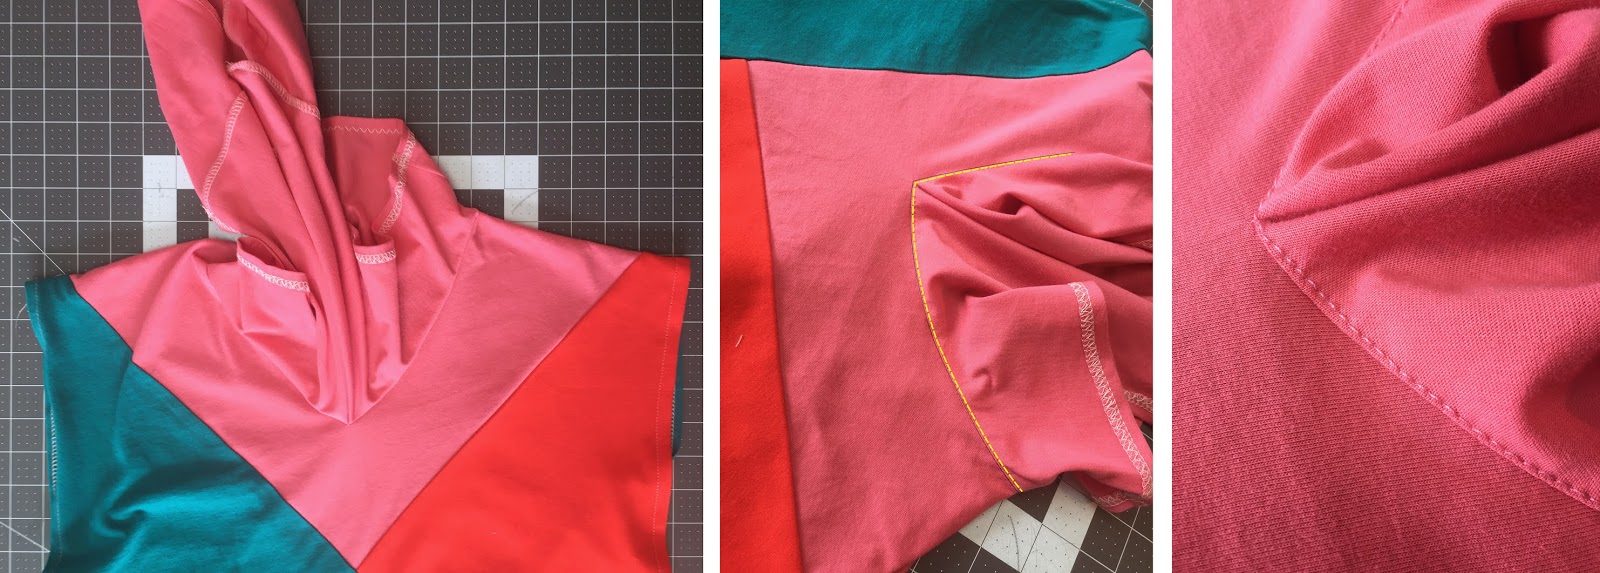
Turn wrong side out (your garment is inside the facing, the wrong side of the facing visible) and hand stitch the shoulder seam allowances together:
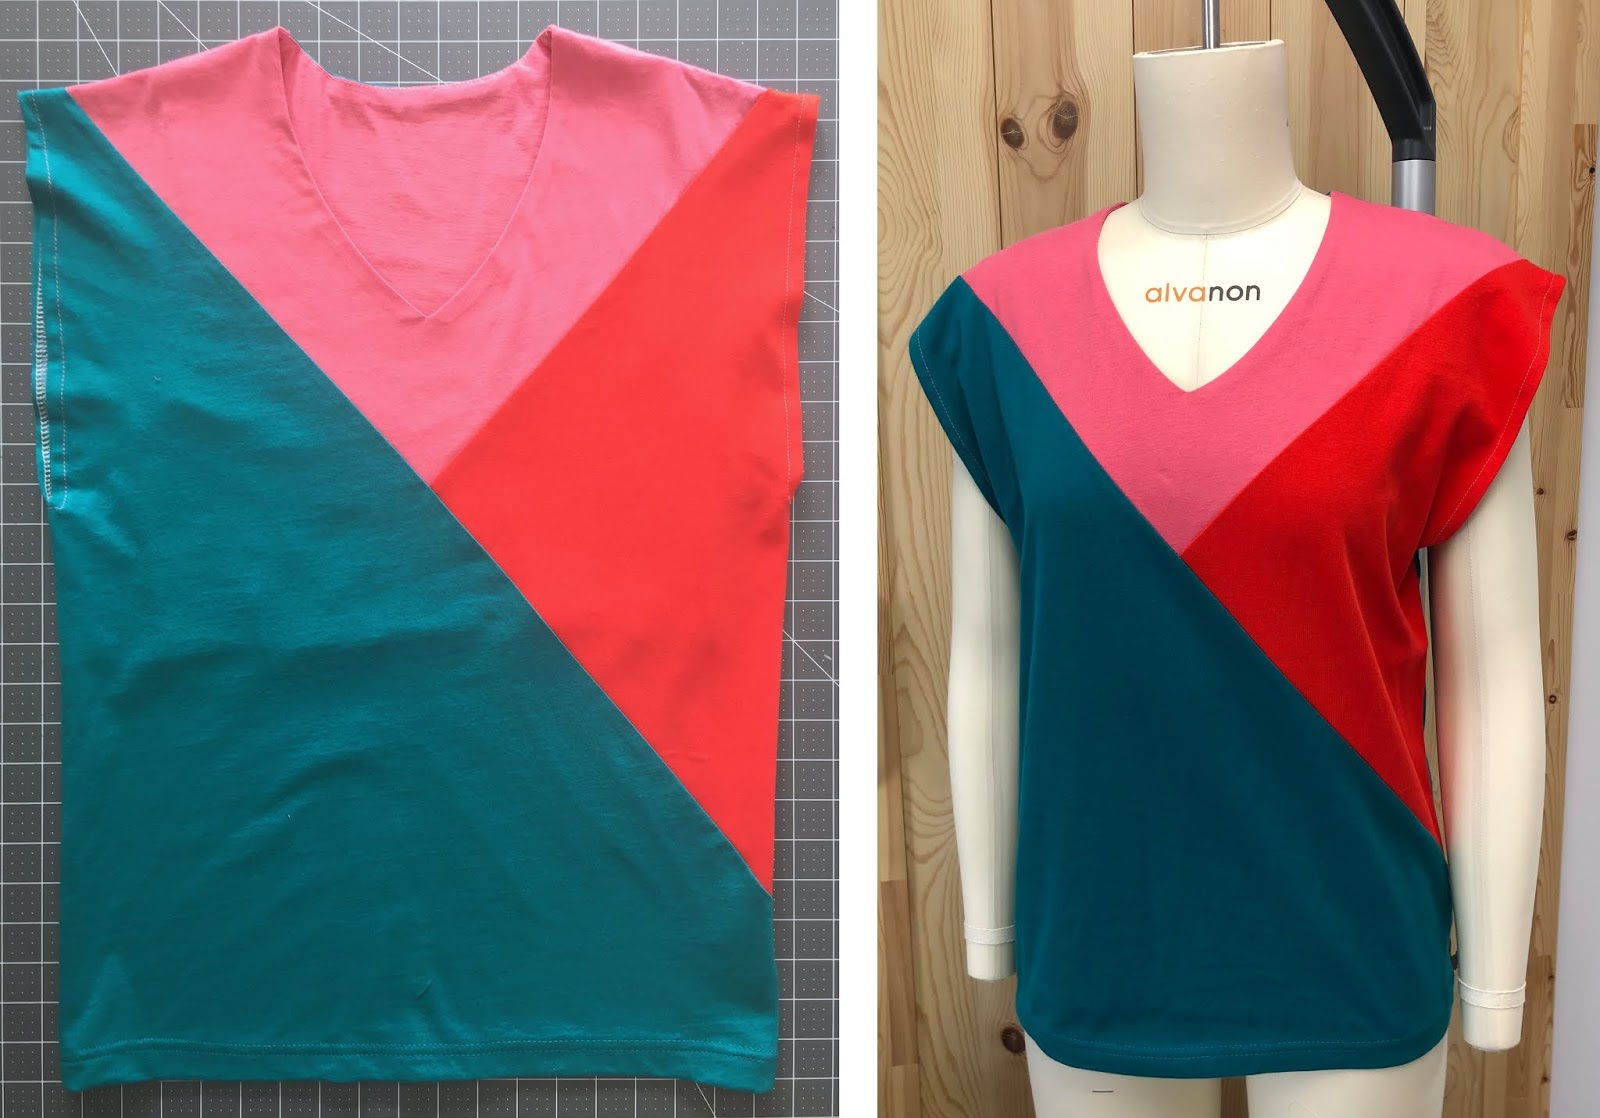
Ready, set, go! Print the instructions, le coloring page and have fun!
We are looking forwards to seeing your BOBBIE tops on Instagram #jaliebobbie
and in our Facebook group!
and in our Facebook group!
← ROSE Shirt // Shirt Collar Tutorial FREDERIC HOODIE // TIPS AND TRICKS - PART 2/2 →